PORTRAITURE WITH NATURAL LIGHT — 2HR WORKSHOP
Instructor: Sonny Green | www.sonny.photos
Meeting Place: Clerks Coffee Company — Emeline Hotel
181 Church St., Charleston, SC
(Meet at the four center chairs. If late, text 843-843-6542.)
Time: 10am-12noon
Price: $50 per person
READ FIRST: How to Use This Guide
This is a group workshop, not a private lesson.
We move together. We learn together.
The better the group stays aligned, the stronger each shooting exercise becomes.
Please know how to operate your camera (phone or DSLR/mirrorless) before class:
• change focus
• adjust exposure
• know how to switch between lenses or modes
You do NOT need to know lighting theory.
That’s why you’re here.
This guide is a roadmap — intentionally overstuffed.
You won’t master everything today, but you will leave with a new way of seeing light, shaping light, and directing a portrait with confidence.
Each section includes:
• what the concept means
• why it matters
• how it affects portraits
• one field drill
• one pro tip
The more curious, patient, and observant you are, the better this workshop gets.
OVERVIEW
Natural-light portraiture forces you to see the world as your studio.
No flash. No strobes. No artificial help.
Just the sun, the sky, shadows, walls, reflectors, and your awareness.
In this workshop, you will learn how to:
• find flattering light anywhere
• read direction, shape, and quality of light
• use reflectors to sculpt faces
• avoid harsh or unflattering conditions
• position the model for the strongest emotional read
• troubleshoot exposure on the fly
• control mood through angle, distance, and background
• understand when not to shoot
• use shallow depth of field as support, not a crutch
Natural light is honest.
It tells the truth.
Your job is to learn how to read it and shape it, not fight it.
This workshop unfolds in three stages:
- Seeing Light — understanding quality, direction, intensity, and how it shapes a face
- Shaping Light — using reflectors, shade, bounce surfaces, and angles
- Field Portraits — directing a model through natural-light environments
1. SEEING LIGHT — Understanding What Natural Light Actually Does
Most beginners see light as brightness.
Professionals see light as shape.
Natural light affects portraiture in four ways:
A. Quality of Light (Soft vs. Hard)
Light has texture, just like skin, fabric, or stone.
Before you worry about settings, lenses, or posing, you must learn to feel the quality of light.
Soft light comes from a large light source relative to your subject.
Hard light comes from a small light source relative to your subject.
This has nothing to do with how bright the light is.
It has everything to do with how the light wraps.
Soft Light
- Large source (cloudy sky, window, shade, reflected light)
- Smooth transitions from light to shadow
- Forgiving on skin
- Calm, intimate, gentle mood
Soft light doesn’t judge.
It hides wrinkles, softens blemishes, and lets the subject relax.
Hard Light
- Small source (direct sun, bare bulb, phone flashlight)
- Sharp shadow edges
- Reveals texture
- Bold, dramatic, sometimes confrontational mood
Hard light tells the truth.
Every line, pore, and edge shows up.
Neither is “better.”
They just say different things.
How It Affects Portraits
- Soft light smooths texture and lowers emotional volume
- Hard light exaggerates texture and raises emotional volume
- Midday sun = hard, unforgiving, graphic
- Cloud cover = a giant softbox
- Open shade = soft light with direction
- Reflected light = soft light with character
A portrait taken in the wrong quality of light will never feel right—no matter how good the pose is.
Exercise — The Two Faces Test
- Find one subject (a classmate, friend, or yourself).
- Photograph them in hard light:
- Direct sun
- A single uncovered bulb
- Strong side light
- Photograph the same subject in soft light:
- Open shade
- Window light
- Cloudy outdoor light
- Keep the pose the same. Change only the light.
Compare the images and ask:
- Which feels calmer?
- Which feels more intense?
- Which version matches the story I want to tell?
This exercise teaches you that light quality alone can change the entire emotional meaning of a portrait.
Quick Tip — If the shadows have hard edges, the light is hard.
Don’t overthink it.
Look at the shadows on the face.
- Soft edge = soft light
- Sharp edge = hard light
If the light feels wrong, don’t change your camera settings first.
Move the subject. Move yourself. Change the light quality.
Light always comes before technique.
B. Direction of Light
Where the light hits the face matters more than how strong it is.
Light direction is emotional grammar.
You can take the same person, in the same place, with the same camera settings—
and completely change the emotional read by turning them a few degrees.
Light doesn’t just illuminate a face.
It decides what the face says.
There are four essential portrait light directions every photographer must understand.
1. Front Light
Bright · Even · Safe · Low Texture
- Light hits the face straight on
- Minimal shadows
- Flattens texture
- Very readable
Front light feels honest, neutral, and approachable.
It’s great for clarity, documentation, and clean headshots.
But it’s emotionally quiet.
It doesn’t sculpt.
It doesn’t whisper secrets.
Use front light when:
- You want clarity over drama
- The story is gentle or informational
- You want the subject to feel safe and open
2. Side Light
Sculpted · Dimensional · Dramatic
- Light hits from the side (45°–90°)
- One side lit, one side in shadow
- Reveals bone structure and texture
Side light creates depth.
It introduces tension and mystery.
It feels human and cinematic.
This is where portraits start to feel alive.
Use side light when:
- You want mood
- You want shape
- You want emotion without theatrics
Most strong natural-light portraits live here.
3. Back Light
Glowing · Cinematic · Soft
- Light comes from behind the subject
- Hair glows
- Edges bloom
- Face needs fill or careful exposure
Back light feels nostalgic.
It feels like memory.
It wraps the subject in atmosphere.
Back lighting separates your subject from the world instead of flattening them into it.
Use back light when:
- You want softness
- You want romance or quiet drama
- You want the image to feel lived-in, not posed
4. Top Light
Harsh · Unforgiving · Deep Shadows
- Light comes from directly above
- Eye sockets darken
- Nose shadows drop straight down
- Skin texture exaggerates
This is midday sun.
This is overhead lighting.
Avoid it unless you mean it.
Top light can feel:
- Tense
- Aggressive
- Brutal
- Documentary
Use it only when:
- You want honesty over beauty
- You want confrontation
- You want the light to be felt, not hidden
Field Drill — “Four Angles, One Face”
- Place your model in one fixed spot.
- Do not move your camera.
- Walk the model through these positions:
- Facing the light (front light)
- Turn 90° (side light)
- Turn away (back light)
- Step under overhead light or harsh sun (top light)
- Shoot one portrait in each position.
Review the four images side by side.
Ask:
- Which feels calm?
- Which feels intimate?
- Which feels dramatic?
- Which feels uncomfortable?
This drill teaches you that emotion lives in direction, not settings.
Pro Tip — Turn the model, not the camera.
New photographers chase light by moving themselves.
Experienced photographers rotate the subject.
The face finds the light faster than you do.
If the portrait feels flat:
- Turn the chin slightly
- Rotate the shoulders
- Let the light rake across the face
Small turns create massive emotional shifts.
Light direction is control.
Learn it once, and every portrait gets stronger.
C. Intensity of Light (Exposure Control)
Natural light is unstable.
It shifts minute to minute, cloud to cloud, step to step.
Strong light blows out highlights.
Weak light muddies shadows.
Your job is not to fight this.
Your job is to decide what matters.
In portraits, one thing always matters more than everything else:
Skin.
If the skin is right, the photo works.
If the skin is wrong, nothing else can save it.
Exposure is not technical.
It is ethical.
You are choosing what gets protected and what gets sacrificed.
What Intensity of Light Really Means
Intensity is not direction.
Intensity is how much light is hitting the subject.
Two people can stand in the same direction of light and look completely different depending on:
- Cloud thickness
- Time of day
- Reflection from nearby walls
- Open shade vs. dappled light
This is why exposure must be active, not automatic.
What We’ll Learn to Do
You’ll learn how to:
-
Ride the exposure triangle quickly
(aperture, shutter, ISO — without thinking) - Expose for skin, not the background
- Use shadows intentionally instead of avoiding them
-
Protect highlight zones
(nose, cheeks, forehead — the first to blow out)
Cameras try to average the world.
Portraits require preference.
You are not here to please the sensor.
You are here to honor the face.
Expose for Skin, Always
Skin tones tell the truth faster than any histogram.
If you expose for the background:
- Faces go dark
- Emotion disappears
- The image feels distant
If you expose for the face:
- Backgrounds may blow out
- Shadows may deepen
- But the subject stays alive
That’s the trade.
And it’s the correct one.
Common Portrait Exposure Mistakes
- Overexposed noses and foreheads
(light hitting skin directly) - Shiny cheeks from harsh light
- Faces turning gray in shade
- Letting the camera meter for the sky
These are not beginner mistakes.
They are attention mistakes.
Field Drill — “Expose the Face First”
- Point your camera directly at the face.
- Ignore everything else in the frame.
- Adjust exposure until:
- Skin looks natural
- Highlights are not blown
- Shadows still feel alive
- Lock exposure.
- Recompose the image without changing settings.
- Take the shot.
Repeat this process until it becomes automatic.
This drill trains one core instinct:
The face sets the exposure.
Everything else adapts.
Shadow Is Not the Enemy
Many photographers overexpose trying to “save” shadows.
But shadows are where portraits gain depth.
A portrait with no shadows feels flat.
A portrait with controlled shadows feels dimensional.
Let the shadows exist.
Let them support the light.
Exposure is not about brightness.
It’s about balance.
Pro Tip — If the skin looks wrong, the whole photo is wrong.
You can fix a background later.
You cannot fix dead skin tones.
If you’re unsure:
- Slightly underexpose
- Protect highlights
- Let the face lead
When you get exposure right on skin,
everything else in the image forgives you.
D. The Background as Part of the Light
Light does not stop at the subject.
It keeps working in the background.
Most photographers think of background as scenery.
In portraiture, background is light’s second job.
Backgrounds influence:
- mood
- contrast
- color tone
- perceived exposure
- depth
You can have perfect light on a face and still ruin the portrait with the wrong background.
The background finishes the sentence the light starts.
How Backgrounds Change the Portrait
Bright backgrounds flatten the subject.
They compete for attention.
They pull the eye away from the face.
They make exposure feel weaker, even when it’s correct.
Dark backgrounds carve the subject forward.
They create separation.
They add depth.
They make the light feel intentional and dramatic.
This is why two portraits shot in the same light can feel completely different.
Nothing about the light changed.
Only what surrounded it.
Backgrounds Control Perceived Exposure
Here’s a truth most beginners miss:
A face can be exposed correctly
and still feel wrong
because the background is too bright.
Your eye reads exposure comparatively, not absolutely.
- Bright background → subject feels darker
- Dark background → subject feels brighter
- Neutral background → subject feels balanced
This is why exposure meters lie in portraits.
Your eye is smarter.
Backgrounds Carry Emotion
Backgrounds are emotional context.
- Greenery feels calm, alive, forgiving
- Dark doorways feel intimate, private, serious
- Bright walls feel open, casual, sometimes flat
- Reflective surfaces add complexity and energy
You are not just choosing where to place your subject.
You are choosing what emotional world they live in.
Field Drill — “Background Swap”
Keep everything the same:
- Same subject
- Same light direction
- Same exposure
- Same camera settings
Change only the background.
Shoot the model:
- Against a bright wall
- In front of a dark doorway
- With greenery behind them
- Near a reflective window or glass
Review the images side by side.
Ask:
- Which portrait feels strongest?
- Which feels flattest?
- Which feels most intentional?
- Which background supports the subject instead of competing?
This drill proves a powerful lesson:
Background choice can change the portrait
more than a new lens ever will.
Separation Is Not Always Blur
You don’t always need shallow depth of field to separate a subject.
Contrast does the job too.
A darker background behind a lighter face = instant separation.
A brighter background behind a light face = visual fight.
When blur fails, contrast saves the image.
Common Background Mistakes
- Bright walls behind light skin
- Busy textures pulling attention
- Strong colors reflecting onto faces
- High-contrast patterns behind eyes
If the background demands attention,
it is no longer a background.
Pro Tip — A good background hides more sins than good gear.
Bad gear can be forgiven.
Bad background choices cannot.
When a portrait feels “off, ” ask this first:
Is the background helping the light—or fighting it?
Move the subject.
Turn them slightly.
Take two steps left or right.
Most great portraits are found by background awareness, not camera upgrades.
2. SHAPING LIGHT — Using Tools, Angles & Surfaces
Natural light portraiture is not passive.
You don’t just “take what you get.”
You shape it.
We use:
• reflectors (white, silver, gold)
• shade
• diffusion
• bounce surfaces (concrete, sand, brick walls)
• angle + distance
• where the model stands
A. Reflectors — Your Portable Sun
A reflector is not an accessory.
It’s a second light source you can control.
You’re not “fixing” bad light.
You’re redirecting good light.
Reflectors let you take whatever light exists and decide where it lands.
They allow you to:
- brighten eyes
- soften harsh shadows
- add glow under the chin
- revive dull side-light
- fill the face in backlight
- shape the face without adding artificial light
No batteries.
No menus.
Just physics.
What a Reflector Actually Does
A reflector takes light from one direction
and reintroduces it where the camera needs it most.
Think of it as a polite argument with the sun:
“I like what you’re doing…
but I’d like a little help right here.”
Used well, a reflector feels invisible.
Used poorly, it looks obvious and fake.
The goal is not brightness.
The goal is balance.
Reflector Surfaces and Their Personality
Each surface speaks a different emotional language.
Silver — Bright, Crisp, Direct
- Strong fill
- High contrast
- Sharp catchlights
- Best for cloudy days, shade, or backlight
Use when the light is weak or flat.
White — Soft, Natural, Forgiving
- Gentle fill
- Smooth transitions
- Skin-friendly
- Feels invisible when done right
This is the safest choice for portraits.
Gold — Warm, Stylized
- Adds warmth quickly
- Can feel cinematic or artificial
- Powerful near sunset
Use sparingly. Gold shows mistakes fast.
Mixed — Punchy, Balanced
- Adds warmth without overpowering
- Good compromise outdoors
Great when you want energy without heavy color shift.
Where You Place the Reflector Matters More Than Which One You Use
Most beginners hold reflectors too high.
That kills the eyes.
Light from below:
- lifts shadows
- brightens eyes
- adds life to the face
Light from the side:
- sculpts
- adds dimension
- enhances bone structure
Tiny movements matter.
An inch can change everything.
Field Drill — “The Eye Light Test”
- Place your subject facing the light.
- Hold the reflector low, angled upward toward the face.
- Slowly raise and lower it.
- Watch the eyes.
You’ll see the moment when:
- eyes catch light
- skin smooths
- shadows soften
- the portrait suddenly feels alive
Take the photo right there.
This drill trains you to see light instead of guessing.
Reflectors in Backlight
Backlight is beautiful.
Backlight without fill is risky.
A reflector in backlight:
- saves skin tones
- adds separation
- keeps the face readable
- preserves mood without flattening
This is where reflectors earn their reputation.
Common Reflector Mistakes
- Holding it too high
- Using silver too close
- Overfilling the face
- Ignoring eye light
- Letting color contaminate skin tones
If the face looks shiny or fake,
you’ve gone too far.
Pull back.
Practice Exercise — “One Face, Four Reflectors”
Photograph the same subject using:
- No reflector
- White reflector
- Silver reflector
- Gold or mixed reflector
Keep everything else the same.
Review:
- Which feels most natural?
- Which feels most dramatic?
- Which would you choose for a real client?
This builds decision-making, not dependency.
Pro Tip — If the eyes die, the portrait dies.
You can forgive:
- soft focus
- imperfect framing
- uneven light
But dead eyes kill emotional connection instantly.
Before pressing the shutter, ask:
“Are the eyes alive?”
If not, move the reflector.
Light the eyes.
Then shoot.
B. Shade as Your Softbox
Shade is not the absence of light.
Shade is light that’s been tamed.
For portraits, shade is one of the most powerful tools you’ll ever use because it does the hardest work for you automatically.
Shade:
- softens skin
- evens exposure
- reduces harsh hotspots
- gives clean, controllable color
- creates consistency from shot to shot
This is why experienced photographers hunt shade first and ask questions later.
But here’s the key truth:
Not all shade is equal.
What Shade Actually Does
Shade works by turning the entire sky into your light source.
Instead of one small, brutal sun, you get:
- a huge, soft light
- smoother transitions
- forgiving shadows
- more room for error
This is why shade feels calm.
It removes visual stress from the face.
But shade also removes direction.
And direction is what gives portraits shape.
Your job is not to hide in shade.
Your job is to work the edge of it.
Types of Shade (and Their Personality)
Each kind of shade carries a different mood.
Building Shade
- Clean
- Neutral color
- Predictable
- Great for skin tones
This is the safest, most professional shade.
Tree Shade
- Organic
- Patterned
- Can be beautiful or chaotic
Watch for dappled light — it can destroy faces fast.
Overhangs
- Controlled
- Directional
- Can feel studio-like
Great for consistent portraits.
Alleyways
- Moody
- Directional
- Cinematic
Perfect for dramatic or editorial portraits.
Shade isn’t just a tool.
It’s a tone decision.
Open Shade vs. Dead Shade
There’s good shade…
and there’s lifeless shade.
Dead shade:
- deep
- flat
- gray
- eyes look empty
Open shade:
- bright
- soft
- directional
- eyes stay alive
Open shade always faces some light source — sky, street, reflection.
That direction is everything.
Field Drill — “Find the Open Shade Edge”
- Place your subject fully in shade.
- Slowly step them toward the light.
- Watch the face.
At a certain point:
- skin stays soft
- eyes brighten
- shadows gain shape
- contrast appears without harshness
Stop right there.
That transition zone — between light and shade — is where the best portraits live.
Shoot there.
Why the Edge of Shade Is Magic
At the edge, you get:
- softness from shade
- direction from light
- sculpted faces
- controlled exposure
This is the sweet spot where portraits look intentional without looking lit.
It’s nature’s softbox with built-in modeling.
Practice Exercise — “Four Steps Forward”
- Place your subject deep in shade.
- Take one photo.
- Step them forward one step toward the light.
- Shoot again.
- Repeat four times.
Review:
- Where do the eyes wake up?
- Where does the face gain shape?
- Where does the light still feel gentle?
That position is your default portrait zone.
Common Shade Mistakes
- Standing too deep in shade
- Ignoring direction
- Allowing dappled light
- Letting the background go brighter than the face
- Forgetting about eye light
Shade is forgiving — but not lazy.
Pro Tip — The brightest part of the shade is the best part of the shade.
If the shade feels heavy or dull, move closer to light.
If the face feels flat, chase direction.
If the eyes look dead, you’re too deep.
Shade should feel soft and alive.
Master shade, and you’ll make better portraits in any city, any time of day, with any camera.
C. Backlight — The Cinematic Look
Backlight is where portraits stop feeling like documentation and start feeling like cinema.
Backlight creates:
- halos around hair and shoulders
- glow instead of glare
- soft silhouettes
- dreamy atmosphere
- emotional separation from the background
It’s the light you recognize instantly — the kind that feels like memory, not record.
But backlight is unforgiving if you don’t control it.
Backlight is not about the sun.
It’s about what you choose to expose for.
What Backlight Actually Does
When the light comes from behind your subject:
- the background brightens
- the edges glow
- the face falls into shadow
This creates mood automatically — but it also creates a trap.
If you expose for the background:
- the face goes dark
- eyes disappear
- emotion collapses
If you expose for the face:
- the background blows out
- the glow intensifies
- the portrait becomes cinematic
Always expose for the face.
Everything else becomes atmosphere.
Why Backlight Feels Emotional
Backlight mimics how memory works.
We remember:
- outlines
- feelings
- warmth
- glow
We don’t remember details in the background.
Backlight removes visual noise and leaves only what matters:
the person.
That’s why it feels nostalgic, romantic, and cinematic all at once.
The Role of the Reflector in Backlight
Backlight without fill = silhouette.
Backlight with fill = portrait.
A reflector turns backlight into control.
Used correctly, it:
- brings light back into the eyes
- lifts the face without killing the glow
- balances exposure naturally
- saves you from harsh editing later
The reflector doesn’t fight the sun.
It translates it.
Field Drill — “Halo Control”
Place your subject with the sun directly behind their head or shoulder line.
Shoot three frames:
-
No Reflector
- Watch the face drop into shadow
- Notice the silhouette and mood
-
Reflector Low (angled up)
- Eyes come alive
- Chin and cheeks soften
- Glow remains
-
Reflector High (angled down)
- Face flattens
- Glow weakens
- Light feels less cinematic
Compare the three.
You’ll see immediately:
- low reflector = depth and drama
- high reflector = safe but dull
Where to Place the Reflector
The reflector should sit:
- just below chest level
- angled up toward the face
- far enough to stay soft
- close enough to light the eyes
If the reflector is too close:
- light becomes harsh
- shadows vanish
- magic disappears
If it’s too far:
- nothing happens
Distance controls mood.
Practice Exercise — “Backlight Walk”
- Find three different backlight situations:
- open sun
- filtered sun through trees
- reflected sun off glass or water
- In each situation:
- expose for the face
- add reflector low
- take two frames: one relaxed, one expressive
- Review how the glow changes in each environment.
You’ll learn that backlight is not one look —
it’s a range of emotional temperatures.
Common Backlight Mistakes
- Exposing for the background
- Forgetting eye light
- Using the reflector too high
- Standing too close to the sun source
- Letting flare wash out the face
Backlight is subtle.
It rewards patience.
Pro Tip — Backlight + reflector = effortless cinematic portrait.
If the portrait feels flat:
- lower the reflector
If the face feels dark: - move the reflector closer
If the glow disappears: - back the reflector off
Backlight doesn’t need force.
It needs balance.
Master this, and you’ll make portraits that feel like stills from a film — not photos trying too hard.
D. Shooting Into Reflective Surfaces
Reflective surfaces are free light.
They’re everywhere.
Most people walk past them.
Photographers use them.
Windows, mirrors, parked cars, water, polished stone, light-colored walls — all of these bounce light back into your subject in ways that feel natural, soft, and cinematic.
You’re not adding light.
You’re redirecting what already exists.
What Reflective Surfaces Actually Do
Reflective surfaces:
- add soft glow without harshness
- create natural catchlights in the eyes
- fill shadows without flattening the face
- shape cheekbones and jawlines subtly
- add foreground layers and depth
Unlike artificial lights, reflections feel believable.
They don’t announce themselves.
They just work.
This is why street portraits and environmental portraits feel alive —
the light is coming from the world itself.
The “Bounce Wall” Effect
A light-colored surface in open shade acts like a giant reflector.
Think:
- pastel building walls
- white storefronts
- sunlit sidewalks
- pale stone or concrete
- parked cars catching sunlight
The sun hits the surface.
The surface throws soft light back.
Your subject gets wrapped instead of blasted.
This is portrait gold.
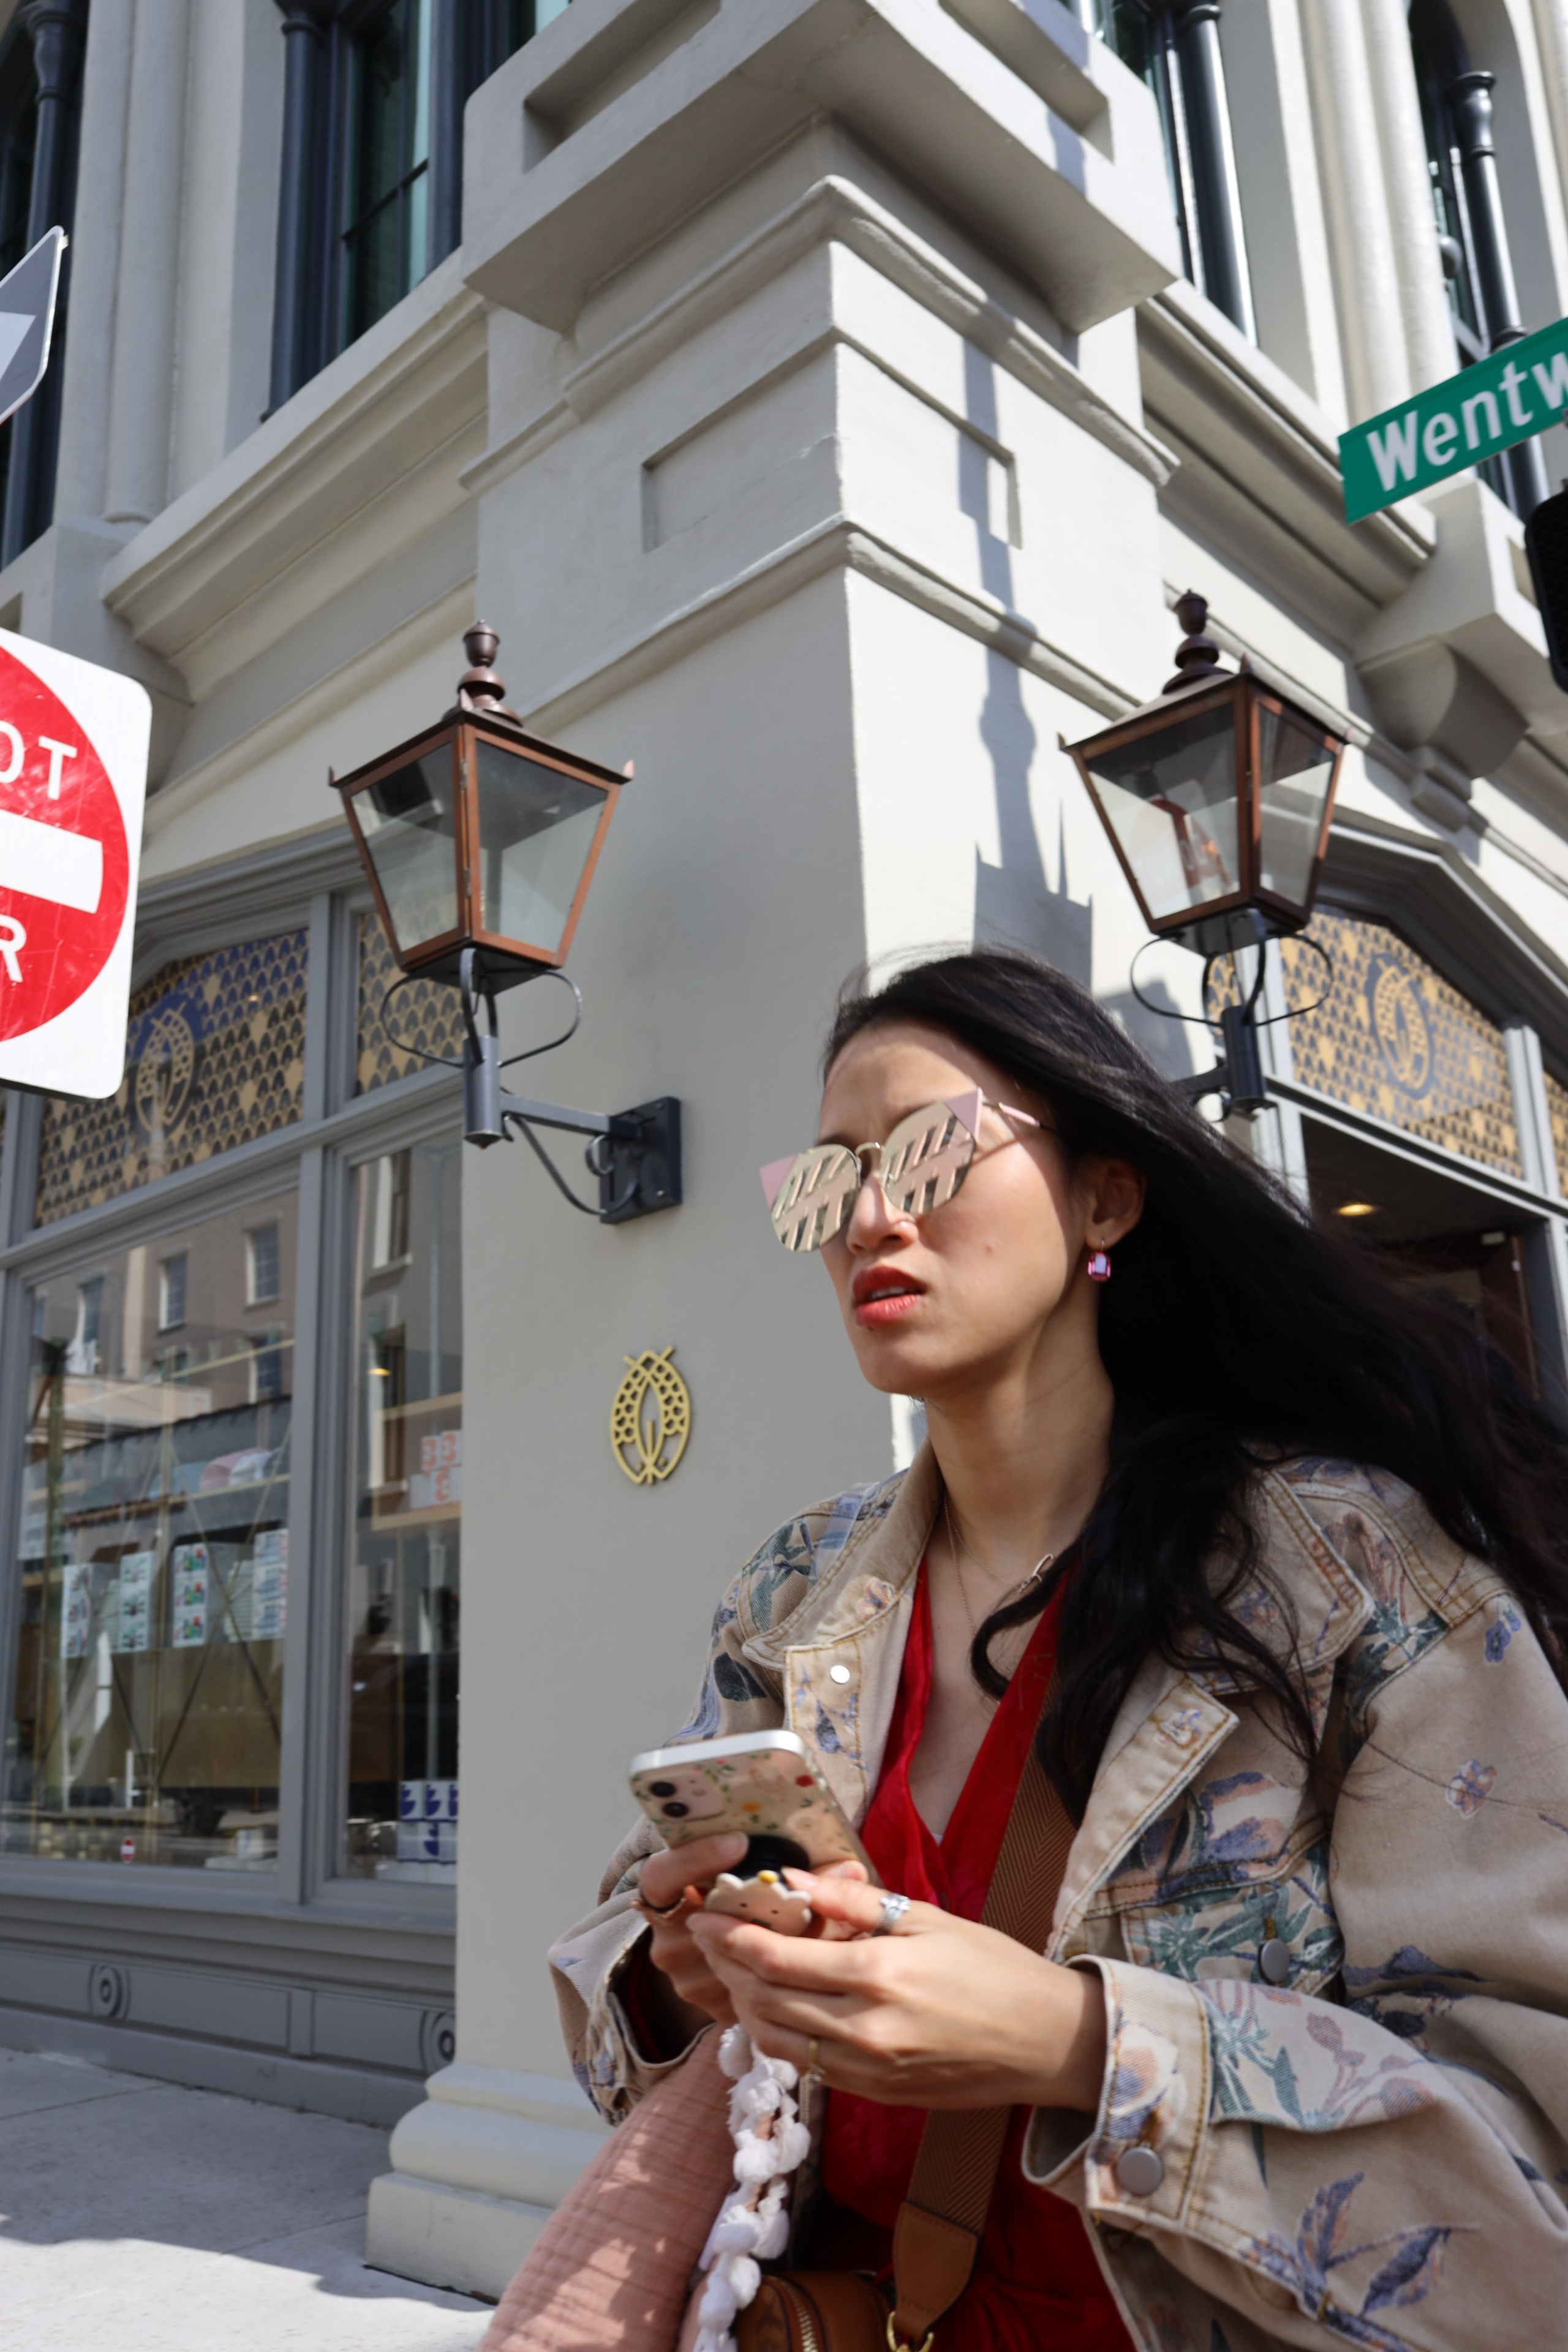
Why Charleston, SC Is Perfect for This
Charleston, SC is built for reflective light:
- pastel walls
- historic paint tones
- white trim
- large windows
- reflective glass
- light stone streets
You don’t need gear.
You just need to see where the light is bouncing.
Most portraits don’t need more light.
They need better direction.
Field Drill — “Find the Bounce Wall”
- Walk until you find a light-colored surface in open shade
(pastel wall, white building, storefront window). - Place your subject facing the reflected light, not the sun.
- Shoot three frames:
- Subject close to the wall
- Subject a few feet away
- Subject turned slightly off-axis
- Watch how the face changes:
- Eyes brighten
- Shadows soften
- Skin tones even out
You’ll feel like you added a light —
but you didn’t.
Using Windows & Glass Creatively
Windows don’t just reflect — they layer.
Shoot:
- through glass for foreground haze
- beside glass for side fill
- toward glass for eye light
- at angles for double reflections
Glass gives you:
- depth
- atmosphere
- subtle distortion
- visual storytelling
A portrait with reflection feels like a thought, not a statement.
Practice Exercise — “Three Reflections”
Find one subject and photograph them using:
- A wall reflection
- A window reflection
- A car or water reflection
Keep the subject still.
Only change the reflective surface.
Compare:
- softness
- eye light
- mood
- intimacy
You’ll learn quickly which reflections feel calm, dramatic, or cinematic.
Common Mistakes
- Standing the subject too far from the reflective source
- Using dark or dirty surfaces that absorb light
- Ignoring eye direction
- Forgetting that reflections move as you move
Light changes when you shift inches.
So does the portrait.
Pro Tip
Pastel walls are free lighting equipment.
If the light feels harsh:
- step into shade
- turn toward a pale surface
- let the city light your subject for you
Once you start seeing reflections,
you’ll never stop noticing them —
and your portraits will immediately feel more intentional, calmer, and more alive.
E. Troubleshooting Harsh Light
Harsh light isn’t the enemy.
Standing in the wrong place is.
Midday sun, cloud breaks, high contrast — this is where most people panic.
Pros don’t panic.
They redirect.
When the sun is brutal, you don’t overpower it.
You outsmart it.
What Harsh Light Actually Does
Harsh light:
- creates deep, ugly shadows under eyes, nose, and chin
- exaggerates texture and sweat
- blows highlights on foreheads and cheeks
- causes squinting and tension
- kills comfort and connection
If the light feels aggressive, the portrait will feel aggressive.
Your job is not to remove the sun —
it’s to change how the sun hits the face.
The Fixes (In Order of Speed)
When the sun is harsh:
-
Turn the model
Don’t move yourself first. Rotate the face until shadows soften. -
Step into shade
Even partial shade is a gift. -
Use a reflector
Bounce light back gently instead of letting shadows go black. -
Shoot close to buildings
Walls block, bounce, and shape light. -
Use your own body
You are a walking flag. Block the sun with your shoulder or back. -
Angle the face
Light across the face is better than light into the face.
These are fast fixes.
No settings required.
What NOT to Do
Never put your subject looking directly into the sun.
They will:
- squint
- tense up
- hate you
- look uncomfortable
- produce blown highlights you can’t fix
No portrait is worth that.
If the subject looks uncomfortable,
the photo will always feel uncomfortable.
The Golden Rule of Harsh Light
If you’re fighting the sun,
you’re standing in the wrong place.
The sun doesn’t move for you.
You move for it.
Field Drill — “Fix the Noon Sun”
- Place your model with their back to the sun.
- Expose for the face.
- Add a reflector low, angled up.
- Take three shots:
- No reflector
- Reflector low
- Reflector slightly off to the side
Compare:
- Eye brightness
- Shadow softness
- Skin tone accuracy
This drill turns brutal noon light into clean, cinematic portrait light in under 60 seconds.
Practice Exercise — “Shadow Sculpting”
- Stand in harsh sun.
- Slowly rotate the model in small increments.
- Watch how shadows move across:
- eye sockets
- nose
- cheekbones
- Stop when the shadows look intentional instead of accidental.
- Shoot.
You’ll learn that harsh light is only harsh when it hits wrong.
Common Beginner Mistakes
- Standing still and hoping settings fix the light
- Ignoring where shadows land on the face
- Overexposing to “save shadows”
- Forcing sunlit portraits instead of shaping them
Light isn’t solved in the camera.
It’s solved with position.
Pro Tip
If the sun feels aggressive, use it from behind.
Backlight + reflector = control.
Side light + body block = relief.
Shade + bounce = calm.
Once you learn to troubleshoot harsh light,
you stop fearing bright days —
and start seeing them as opportunities.
3. FIELD PORTRAITS — Directing a Model With Intention
Natural-light portraiture is 50% light — 50% directing.
We need to learn to:
• pose simply
• adjust micro-angles
• guide hands, eyes, chin
• choose flattering positions
• use backgrounds intentionally
• move through scenes with flow
A. Portraits With Clean Backgrounds
Before you shoot the person, clear the frame.
Most bad portraits aren’t bad because of light, lens, or expression.
They’re bad because the background is fighting the subject.
Clean backgrounds don’t mean boring backgrounds.
They mean supportive backgrounds.
A clean background:
- doesn’t steal attention
- doesn’t cut through the head or body
- doesn’t introduce visual noise
- doesn’t compete for sharpness
Your job is to remove distractions before they become problems.
The Truth About Backgrounds
The camera records everything.
The viewer reads everything.
Poles growing out of heads.
Bright patches behind faces.
Random people, signs, edges, and shapes.
None of that can be “unseen.”
If the background is messy, the viewer doesn’t know where to rest.
If the background is clean, the subject becomes inevitable.
How Clean Backgrounds Actually Happen
You don’t fix backgrounds in Lightroom.
You fix them with movement.
Most background problems disappear by moving:
- one foot left
- one foot right
- one inch forward
- one inch backward
That’s it.
Not ten feet.
Not a new location.
Just micro-movement.
Beginners freeze.
Experienced photographers orbit.
The Priority Order
When setting up a portrait, always check in this order:
- Background
- Light on the face
- Expression
- Camera settings
If you reverse this order, you will fight every shot.
Background first.
Always.
Field Drill — “The Two-Step Background Fix”
- Ask the model to stand completely still.
- Lock your camera settings.
- Move yourself slowly:
- left
- right
- forward
- backward
- Watch the background edges:
- around the head
- behind the shoulders
- near the waist
- Stop when the background feels quiet.
Take the photo.
This drill trains your eye to solve 95% of portrait problems without touching the camera.
Practice Exercise — “Background Eraser”
Choose one subject and make four portraits:
- Messy background (don’t fix it)
- One foot left
- One foot right
- One inch forward or back
Review all four images side by side.
Ask:
- Which one feels calm?
- Which one feels intentional?
- Which one lets the subject breathe?
This exercise teaches you that backgrounds are solved with feet, not gear.
Common Beginner Mistakes
- Standing in one spot and zooming instead of moving
- Fixating on the face while ignoring the frame edges
- Shooting first, noticing problems later
- Believing shallow depth of field will “save” bad backgrounds
Blur helps.
But blur doesn’t erase bad shapes.
Clean beats blurry every time.
Pro Tip
If the background is wrong, the portrait cannot be right.
A great subject in a bad background becomes a bad photo.
An average subject in a clean background becomes a strong portrait.
The background doesn’t need to be interesting.
It needs to be quiet.
Silence is what lets the subject speak.
B. Working With Textured Backgrounds
Charleston is a gift.
Brick walls. Iron gates. Worn paint. Foliage. Pastel facades.
Texture is everywhere.
Texture adds history.
Texture adds weight.
Texture adds context.
But texture is dangerous.
Handled well, it supports the portrait.
Handled poorly, it steals the portrait.
Your job is not to avoid texture —
it’s to decide how much of it the viewer gets.
What Texture Actually Does
Texture communicates information before the subject does.
Brick feels solid, grounded, historic.
Iron feels rigid, controlled, protective.
Foliage feels alive, soft, organic.
Peeling paint feels timeworn, human, imperfect.
Texture tells a story about place.
Depth of field decides whether that story whispers or shouts.
Two Ways to Use Texture
There are only two honest approaches:
1. Soften the Texture (Shallow DOF)
Use shallow depth of field when:
- the subject’s face is the priority
- the mood is intimate
- the texture is emotional but secondary
- the background should feel like memory
The texture becomes tone.
Color.
Shape.
Atmosphere.
The viewer feels the environment without being distracted by it.
2. Reveal the Texture (Deeper DOF)
Use deeper depth of field when:
- the environment is part of the story
- place matters as much as the person
- you want honesty over romance
- you want the viewer to study, not just feel
Here, texture becomes evidence.
Context.
Truth.
Both are correct — if chosen intentionally.
How DOF Changes the Story Instantly
Same subject.
Same light.
Same pose.
Only depth of field changes.
Wide open:
- emotional
- romantic
- timeless
- personal
Stopped down:
- documentary
- grounded
- specific
- honest
Neither is better.
One is just louder than the other.
Field Drill — “Texture Shift”
- Choose a textured background:
- brick wall
- iron gate
- foliage
- pastel building
- Place your subject 5–10 feet in front of it.
- Shoot one portrait wide open.
- Shoot the same portrait stopped down.
- Keep everything else identical.
Now review:
- Which image feels more emotional?
- Which feels more rooted in place?
- Which tells the story you intended?
This drill trains you to feel depth of field, not calculate it.
Practice Exercise — “Texture Control”
Shoot the same subject against three textured backgrounds:
- Brick
- Foliage
- Iron or painted wall
For each background:
- take one shallow DOF portrait
- take one deeper DOF portrait
Lay them out in pairs.
Ask:
- When did texture help?
- When did it compete?
- When did it become noise?
This exercise builds instinct.
You stop guessing and start choosing.
Common Mistakes With Texture
- Shooting wide open everywhere because it “looks professional”
- Forgetting that texture carries meaning
- Letting texture overpower facial expression
- Using shallow DOF as a crutch instead of a choice
Texture is not decoration.
It’s language.
Depth of field controls the volume.
Pro Tip
Texture becomes emotion when you choose how much to reveal.
Soft texture feels like memory.
Sharp texture feels like truth.
Your job is not to show everything.
Your job is to show what matters most in this moment.
C. Learning Emotional Distance
Distance isn’t technical.
Distance is emotional.
How close you stand tells the viewer how close they’re allowed to be.
Every portrait quietly answers one question:
“How near am I to this person?”
There are three honest distances in portraiture.
Each one changes the emotional temperature instantly.
The Three Distances
1. Close — Intimacy
Close distance feels:
- personal
- vulnerable
- quiet
- human
The viewer is inside the subject’s space.
They can see skin texture.
They can feel breath.
They notice eyes before anything else.
Close portraits feel like whispers.
They demand trust.
Use close distance when:
- emotion matters more than environment
- the moment is quiet or internal
- you want the viewer to lean in
Too close without intention feels invasive.
Close with intention feels sacred.
2. Medium — Presence
Medium distance feels:
- balanced
- conversational
- grounded
- human-scale
This is the distance of eye contact across a table.
It’s honest without pressure.
Personal without intrusion.
Most classic portraits live here.
Use medium distance when:
- you want connection without intensity
- the subject and environment share importance
- the portrait should feel natural, not forced
Medium distance is the safest — but safety isn’t a weakness when chosen.
3. Wide — Context
Wide distance feels:
- observational
- environmental
- documentary
- narrative
The subject becomes part of a larger story.
Place, light, and surroundings speak as loudly as the person.
Wide portraits answer:
“Where is this person in the world?”
Use wide distance when:
- location matters
- story lives in the environment
- you want honesty over intimacy
Wide portraits feel like witnessing, not participating.
Why Distance Changes Emotion
Your lens doesn’t decide intimacy.
Your body does.
Distance controls:
- how vulnerable the subject feels
- how involved the viewer feels
- how much context competes with emotion
Close = fewer escape routes.
Wide = more breathing room.
There is no neutral distance.
Every step forward or back changes the emotional contract.
Field Drill — “Three Distances, One Pose”
- Ask your subject to hold one simple pose.
No movement. No expression change. - Take three portraits:
- Close (tight on face)
- Medium (waist-up or chest-up)
- Wide (full body + environment)
- Do not change light or angle.
Only distance.
Review the images and ask:
- Which feels most intimate?
- Which feels most honest?
- Which tells the clearest story?
This drill teaches you that emotion shifts without touching the camera settings.
Practice Exercise — “Temperature Control”
Choose one subject and one location.
Shoot a short sequence:
- Start wide — establish place.
- Move to medium — establish presence.
- Move close — establish intimacy.
Now reverse it:
- Start close.
- Pull back.
- End wide.
Compare the emotional arc.
You’ll feel how distance creates narrative flow — even without movement.
Common Distance Mistakes
- Standing too far back because it feels “safer”
- Going too close without earning trust
- Using the same distance for every portrait
- Letting the lens decide distance instead of intention
Distance is a choice.
Avoiding the choice weakens the portrait.
Pro Tip
Distance is your emotional dial.
Closer = warmer.
Farther = cooler.
Before you raise the camera, ask:
“How close does this moment want me to be?”
Then step into — or away from — the truth.
D. Shooting Through Objects for Atmosphere
Atmosphere is what turns a portrait from a description into a feeling.
Shooting through objects places the viewer inside the moment instead of outside looking in. It creates depth, softness, and emotional insulation. The subject feels protected. Private. Human.
This is the same idea from shallow depth of field work—but now the goal isn’t blur for blur’s sake.
The goal is mood.
Foreground elements act like a veil.
Not a distraction.
A suggestion.
They tell the viewer:
“You’re not meant to see everything clearly. You’re meant to feel it.”
What Foreground Objects Do Emotionally
Foreground elements:
- soften harsh scenes
- add mystery without hiding the subject
- create intimacy
- imply presence (“someone is standing here with them”)
- separate the portrait from documentary realism
This technique works especially well in natural light because it shapes light instead of fighting it.
What to Shoot Through
Almost anything works—if it’s subtle.
Try:
- Leaves — organic, soft, natural diffusion
- Scarves or fabric — cinematic softness, gentle color cast
- Windows or glass — reflections + glow + separation
- Menus, papers, napkins — unexpected haze, urban texture
- Your own hand or fingers — warm skin tones, controllable blur
The object should kiss the frame, not dominate it.
You’re painting with atmosphere, not blocking the scene.
How to Do It Right
- Keep the foreground very close to the lens
- Keep your focus locked on the subject
- Let the object drift partially into the frame
- Move it slowly—millimeters matter
- Watch how the light wraps, not just how it blurs
If the object is sharp, it’s too far away.
If it distracts, it’s too large or too centered.
Atmosphere works best when it’s barely noticeable—but deeply felt.
Field Drill — “The Veil Test”
- Choose a subject and lock focus on the face.
- Introduce one foreground object near the lens.
- Shoot 8–10 frames while:
- shifting the object slightly left/right
- raising and lowering it
- changing how much it enters the frame
- Keep your subject still.
Review afterward and ask:
- Which image feels cinematic?
- Which feels intimate?
- Which feels cluttered?
- Which feels effortless?
You’ll notice the best frame often has the least obstruction.
Practice Exercise — “Atmosphere Without Blur”
Shoot a portrait at a moderate aperture (f/4–f/5.6).
Do not rely on shallow depth of field.
Now:
- add a foreground element
- let light pass through it
- create softness through atmosphere, not optics
This teaches you that mood comes from layering, not just lens speed.
Common Mistakes
- Overblocking the subject
- Letting the foreground become the subject
- Forgetting to watch the light
- Treating the technique like a gimmick
Atmosphere should feel invisible.
If the viewer notices the trick, it’s too heavy.
Pro Tip
Atmosphere turns portraits into feelings.
When a portrait feels flat, don’t change lenses.
Don’t add gear.
Add a layer.
Ask yourself:
“What can I place between me and this moment to make it feel human?”
Then let the light do the rest.
E. Using DOF to Guide Feeling
Depth of field is not a setting.
It’s an emotional decision.
Every portrait asks a quiet question:
How close should the viewer feel to this person?
Your answer lives in the depth of field.
Shallow or deep focus doesn’t just change what’s sharp.
It changes how the image feels.
What Depth of Field Communicates Emotionally
Shallow DOF
- softness
- romance
- intimacy
- vulnerability
- quiet
- memory
Shallow focus mirrors how we see when we’re emotionally close.
When we care, the world fades.
The subject becomes the only thing that matters.
Shallow DOF says:
“This moment is private. Lean in.”
Deep DOF
- clarity
- openness
- honesty
- presence
- truth
- context
Deep focus invites the viewer to look around.
It acknowledges the environment.
It says the subject belongs to the world they’re standing in.
Deep DOF says:
“This person exists inside a larger story.”
The Mistake Most Beginners Make
They treat shallow DOF as “better.”
As more professional.
As the default.
But blur without intention is just decoration.
If every portrait is shallow, none of them feel intimate anymore.
If everything is soft, nothing feels grounded.
The strongest photographers choose focus the way writers choose tone.
Matching DOF to Emotion
Ask yourself before every portrait:
- Is this moment quiet or loud?
- Is this person protected or exposed?
- Is the story internal or environmental?
- Do I want the viewer to lean in or step back?
Your aperture should answer those questions—not your ego.
When Shallow DOF Works Best
- One-on-one portraits
- Emotional moments
- Gentle light
- Romantic or reflective mood
- When background information distracts from feeling
Shallow focus isolates emotion.
It removes context to amplify connection.
When Deep DOF Works Best
- Environmental portraits
- Documentary moments
- Street or place-based stories
- Honest, unfiltered scenes
- When surroundings are the story
Deep focus respects reality.
It trusts the viewer to interpret the scene.
Field Drill — “One Subject, Two Emotions”
- Choose one subject and one location.
- Shoot a portrait with shallow DOF:
- wide aperture
- background softened
- isolate the face
- Now shoot the same portrait with deep DOF:
- stop down
- include environment
- show context
Compare the two and ask:
- Which feels more intimate?
- Which feels more truthful?
- Which one feels like you?
Neither is “correct.”
Only one is honest to the moment.
Practice Exercise — “Emotion First, Settings Second”
Before touching the camera:
- Say out loud what you want the portrait to feel like
(example: quiet, strong, open, fragile)
Then:
- choose depth of field that supports that word
- adjust aperture after the emotional decision
This trains instinct instead of habit.
Pro Tip
Depth of field is emotional distance.
Wide open brings the viewer closer.
Stopped down gives them room to breathe.
If you don’t decide how close the viewer should feel,
the camera will decide for you.
And cameras don’t understand emotion—
you do.
CLOSING — The Point of Natural Light Portraiture
Natural-light portraiture is not about gear. It is about noticing. Light is a language. Once you learn to read it, you can make beautiful portraits anywhere—parking lots, alleys, sidewalks, shade pockets, pastel walls, windows, or bright open spaces.
Your job is not to control the light. Your job is to collaborate with it.
When you learn to see light clearly, portraiture becomes instinctive. Your settings become second nature. Your direction becomes confident. Your awareness becomes your real tool.
Final Tip: Before you shoot, ask:
“What is the light doing to the face?”
Fix the light first. The portrait will follow.
Final Practice Drill: For every portrait, run a 10-second check:
- Where is the light coming from?
- Are the eyes bright?
- Is the face evenly lit?
- Does the background help?
- Should I add a reflector?
- Should I move the model?
- Should I move?
- Does the emotion match the light?
- Does the pose match the emotion?
- Is this the best possible light in this spot?
Use this after the workshop to keep growing your awareness and intentionality.
It’s about noticing. Light is a language. And once you learn how to read it, you can make beautiful portraits anywhere:
• a parking lot
• a doorway
• an alley
• a sliver of shade
• a cloudy sky
• a harsh sun at noon
• a reflective wall
This is where portraiture becomes instinct.
If you answer these honestly, the portrait becomes intentional — not accidental.
Events
NIGHT PHOTOGRAPHY WALK — Based on the Spirit in the album “Oh Mercy”
SMARTPHONE PHOTOGRAPHY 2hr Workshop

DOGTOWN PHOTOGRAPHY 2hr Workshop
BEGINNER PHOTOGRAPHY 3hr Workshop

A HISTORIC VIEW OF PHOTOGRAPHY 2hr Lecture
Charleston STREET PHOTOGRAPHY 2hr Workshop

CITYSCAPE PHOTOGRAPHY 2hr WORKSHOP — Learn to photograph the soul of a city
CHARLESTON WALK & SHOOT 2hr WORKSHOP (3-5pm)

SHALLOW DEPTH OF FIELD 2hr Workshop

It was great. Sonny really builds confidence in those who lack it by teaching and encouragement. I take these to step out of my normal and comfort zones and I leave with new knowledge.