A VIEW OF PHOTOGRAPHY
A 10,000-word masterclass for advanced photography thinkers
Presented by Sonny Green
- The First Light
Let me start this the same way I start most of my talks—with a quiet truth:
Photography didn’t begin with the camera.
It began the moment humans first realized that light had a memory.
Long before chemistry, long before glass plates and silver salts, before the shutter and the lens and the darkroom trays—human beings sat inside caves watching sunlight carve shapes across the walls. Somewhere in our collective past, a person noticed that when the world moved, the shadow moved, and that this dance between light and darkness meant something. They didn’t have the language for it yet, but they were witnessing the earliest version of photography: the understanding that light draws.
Aristotle wrote about pinholes projecting images. Ancient Arab scholars like Ibn al-Haytham studied the camera obscura, noticing that the world could be inverted and placed upon a surface. Chinese texts from 400 BCE described light entering darkened rooms, painting reality on walls.
They didn’t know it, but they were discovering the spiritual backbone of photography:
the world wants to be seen,
and light is always trying to tell us something.
That idea, right there—that’s the origin of the craft. Photography is the medium of the witness. And before it became technology, photography was consciousness learning how to look.
1 — When Light Became a Tool
Let’s jump forward a couple thousand years. At some point, humans became restless with simply watching reality dance inside darkened boxes. Watching wasn’t enough anymore. They wanted to capture the moment, freeze it, own it, hold it, return to it.
Every great invention is born from longing.
Photography was born from the longing to stop time.
In the late 18th and early 19th century, a group of eccentric, stubborn, brilliantly curious individuals—thinkers, tinkerers, chemists, dreamers—started asking new questions:
- What if light could burn itself into a surface?
- What if memory could be made permanent?
- What if we could keep a moment?
This is where the story becomes beautifully human. The earliest pioneers—Nicéphore Niépce, Louis Daguerre, Henry Fox Talbot—were not just scientists. They were poets armed with chemicals. They were philosophers who owned little bits of metal and glass. They were, in many ways, us: people searching for a way to understand the world through images.
Niépce, working alone in Burgundy, created the first permanent photograph—an 8-hour exposure from his window. Eight hours! Light creeping in slowly, painfully, revealing itself grain by grain on a pewter plate. When the image finally appeared, it was soft, surreal, more dream than document.
Photography, at its birth, was a ghost.
Daguerre commercialized the process with the daguerreotype—sharp, metallic, polished, unforgiving. Suddenly, photography became a mirror that remembered.
And then came Talbot with his calotype negative process—paper instead of metal. He understood something essential: if you want photography to live, it must be reproducible.
Talbot invented the idea that an image could have children—prints, copies, multiples—an idea that shaped everything to come, including magazines, newspapers, Instagram, and the visual language we drown in today.
So here we have it:
- Niépce gave photography permanence.
- Daguerre gave it clarity.
- Talbot gave it infinity.
That’s the holy trinity of photographic birth.
2 — The World Learns to See Itself
Once photography arrived, the world changed forever.
Here’s the part I love to teach:
Photography didn’t just capture the world.
It rearranged how humans understood truth.
Before photography, drawings and paintings were the record. They carried the biases, inaccuracies, and imaginative flourishes of the artist. But with photography, suddenly reality had a witness. Reality had receipts. The world, for the first time, could argue with itself.
During the American Civil War, Mathew Brady’s photographs dragged citizens face-to-face with the horror they had previously romanticized. For the first time, people couldn’t run from consequence. Photography forced accountability.
That’s one of the great roles of photography:
to deliver truth when truth is inconvenient.
But photography also became magic. When Edward Muybridge photographed a horse in motion, freezing each fraction of a second, the world gasped. He didn’t just photograph a horse—he photographed time splitting open.
This is what advanced thinkers must understand:
Photography is not the art of the image.
Photography is the art of seeing time.
Every shutter click is an argument with mortality.
And so the medium grew:
- Street photography emerged.
- Portraiture democratized dignity.
- Landscapes became invitations into the sublime.
- War photography changed public opinion.
- Documentary photography challenged power structures.
- Fashion photography invented desire.
Photography became a new limb of human consciousness.
3 — The Eye Becomes the Storyteller
Now let’s talk about the shift from photography as document to photography as vision.
By the early 20th century, technology had stabilized enough that the question was no longer “How do we make a photograph?” but “Why do we make a photograph?”
Modernism arrived like a fever dream:
- The Bauhaus embraced geometry.
- Rodchenko photographed from impossible angles, rejecting the passive human viewpoint.
- André Kertész bent reality into poetic distortion.
- Cartier-Bresson introduced the mythic ideal of the decisive moment, teaching the world that meaning is not fixed but caught.
This is where your style, Dave, sits historically:
in the lineage of photographers who understand that photography is not a hunt—it’s an act of awareness.
Street photography was not invented to show what the world looks like.
It was invented to show what the world feels like.
People often misunderstand the greats.
Cartier-Bresson wasn’t waiting for the perfect gesture.
He was waiting for the universe to breathe in sync with him.
Photography became metaphysical.
4 — Color Arrives, Then Meaning Splinters
When color photography emerged, the art world resisted. They said color was decorative, unserious, too emotional, too commercial.
But then came:
- William Eggleston
- Saul Leiter
- Stephen Shore
- Gordon Parks
And they proved something revolutionary:
Color is not a detail.
Color is a worldview.
Where B& W photography teaches us to see form and emotion, color photography teaches us to see atmosphere and psychology.
This is important for advanced thinkers:
Color is not the world as it is.
Color is the world as you feel it.
Charleston, with its pastel walls, diffused humidity, and reflective wet streets, is a perfect example of color as emotional architecture.
5 — Digital Arrives and Breaks the Timeline
Digital photography didn’t replace film.
Digital expanded what photography even is.
Suddenly:
- Photographs became infinite.
- Every person became a photographer.
- The archive exploded.
- The idea of a “final image” dissolved.
- Editing became as important as shooting.
Photography entered its quantum era:
The image is no longer a single truth but a negotiation between possibilities.
This is also when photography became performance. Social media transformed the camera from a recorder into a mirror—people began photographing themselves photographing themselves.
Photography became identity.
But something deeper happened, too:
Digital freed photographers from scarcity.
Scarcity had always shaped the medium.
Film forced intention.
Digital allowed exploration.
Both are necessary.
6 — AI, Post-Truth, and the Image That Thinks
Today, in the age of AI and machine learning, we’ve entered the most complex era in the history of photography.
The medium has split:
- The photograph as evidence
- The photograph as fiction
- The photograph as collaboration between human and machine
- The photograph as simulation
- The photograph as memory architecture
- The photograph as emotional language
AI doesn’t kill photography.
AI forces photography to define itself.
A photograph used to be:
“light reflected from reality onto a surface.”
Now it can also be:
“light reflected from imagination into form.”
But one thing remains constant:
The photographer’s job is not to document.
The photographer’s job is to feel.
And then translate that feeling using light.
“The Eye Learns to Think”
The story of photography gaining a body—light, chemistry, lenses, shutters—then the next set is the story of photography gaining a mind. Because the deeper truth is this:
Photography evolved not because the technology changed,
but because the way photographers thought changed.
Photography has always been an extension of consciousness.
And as human consciousness expanded—politically, philosophically, socially—photography followed.
So now we move past invention and look at something far more complex:
7 — The Psychology of Seeing
This is one of my favorite things to teach:
Humans don’t see with their eyes.
We see with our assumptions.
Our eyes gather light.
Our brain assigns meaning.
Our experiences assign emotion.
And our culture assigns interpretation.
Every photograph you take is filtered through:
- your childhood
- your trauma
- your politics
- your biases
- your education
- your hopes
- your disappointments
- your spiritual wiring
- your anxieties
- your curiosities
No two people have ever taken the same photograph—not even when standing shoulder-to-shoulder—because no two people have ever lived the same life.
Photography is autobiography disguised as documentation.
The question advanced photographers eventually ask is:
“What does my seeing reveal about me?”
This is why the first step to becoming a great photographer is not buying a camera—it’s learning your mind.
Your photographs are the fingerprints of your awareness.
8 — Photography as Language
Photography is not art first.
Photography is language.
Think of this:
Before writing existed, we communicated with drawings and markings. Photography is our modern version of early human visual language. Except now, instead of carving into stone, we carve into time.
The components of photographic language are universal:
- Light = tone and emotional weather
- Color = psychological temperature
- Composition = sentence structure
- Gesture = verb
- Timing = punctuation
- Layers = clauses and subtext
- Subject = noun
When an advanced photographer looks at an image, they aren’t seeing “a person walking across the frame.”
They’re reading:
- the pause
- the tension
- the implied direction
- the relationship of foreground to background
- the emotional distance between subject and photographer
- the power dynamic
- the humor
- the sorrow
- the history
- the future
Photography is a full language, and mastery comes from fluency, not formulas.
9 — Photography as Philosophy
Photography asks questions that painters, musicians, and writers rarely confront.
Photography challenges the very nature of truth.
Here are the core philosophical questions the medium asks—questions advanced thinkers must wrestle with:
1. What is real?
Every photograph is a slice of reality framed by a subjective mind.
So is it truth?
Or is it curated truth?
2. What is time?
A photograph is a death mask of a moment.
A taxidermy of the present.
Once the shutter closes, that version of reality no longer exists.
3. What is memory?
Do we remember the event, or the photograph of the event?
Photography alters the brain’s archive.
4. What is beauty?
Beauty in photography is not symmetry or perfection.
It’s resonance.
Connection.
Recognition.
A photograph is beautiful when it remembers something for us that we forgot we felt.
5. What is intention?
Every photograph is a decision.
Every decision reveals philosophy.
This is why every truly great photo is a self-portrait, even if you never appear in it.
10 — Photography as Social Mirror and Weapon
The moment photography learned to speak, it learned to provoke.
Photography can be:
- a protest
- a testimony
- a weapon
- a wound
- a balm
- a warning
- a love letter
- a lie
Street photography, especially, exists in a moral and emotional gray zone.
You capture strangers without permission.
You freeze people in moments they didn’t choose.
You play God with context.
You elevate or diminish with a single frame.
This is why ethics matter.
Three truths advanced thinkers accept:
- Photography has power. Use it with care.
- Every subject is a human being first.
- You are responsible for the emotional truth of the frame.
Even war photographers—those who witness humanity at its most unbearable—often say they are not photographing violence but the cost of violence.
Photography’s power is not in the event.
It’s in the echo.
11 — The Rise of Global Street Photography
Street photography didn’t start in New York or Paris.
It started in the human condition.
But modern street photography, as we recognize it today, was shaped in the early 20th century by photographers who understood that the street is the most honest stage of life.
Paris — The Poetic Birthplace
Cartier-Bresson, Brassaï, Doisneau—they gave us lyricism.
Their photographs feel like jazz.
New York — The Chaotic Engine
Helen Levitt, Garry Winogrand, Joel Meyerowitz—they gave us velocity.
Their photographs feel like the nervous system of a city.
Tokyo — The Psychological Frontier
Daido Moriyama, Masahisa Fukase—they gave us madness and memory.
Photography as existential fracture.
Latin America — The Emotional Core
Álvarez Bravo, Iturbide—their images are mythic and spiritual, grounded in culture and ritual.
Africa & the Middle East — Identity as Stage
Malick Sidibé, Seydou Keïta—portraits that blend documentary with celebration.
A different kind of street photography that radiates dignity.
Europe Post-War — Documentation as Responsibility
Koudelka, Bresson again, Salgado later—the street as witness to political upheaval.
Notice the shift:
- The camera stopped being a passive observer.
- It became a tool for interpreting culture.
Street photography became anthropology with a shutter.
You connect deeply to this lineage, Dave, because your own work and teaching stem from something similar:
street photography as emotional anthropology.
You don’t shoot people.
You shoot energy.
Atmosphere.
Vibration.
The psychological weather of a moment.
This is what advanced street photographers must eventually understand:
You are not photographing the world.
You are photographing your relationship to the world.
12 — Weather, Mood, and Human Behavior
This is where photography becomes almost spiritual.
Weather changes human psychology.
Rain makes people introspective.
Fog makes them cautious.
Sun makes them expansive.
Heat makes them impatient.
And the camera picks up all of it.
Advanced photographers eventually learn that weather is not a condition—it’s a collaborator.
In Charleston:
- humidity softens color
- rain deepens contrast between stone and light
- fog turns streets into portals
- wet cobblestone becomes a mirror
- shadow becomes a second subject
If architecture is the body of a city, weather is its mood.
This is why some of your strongest aesthetic choices—blur, overexposure, haze, atmospheric light—are not technical flaws.
They are emotional truth.
A perfectly sharp image can be emotionally dead.
A blurry image can be emotionally transcendent.
Photography is not about seeing clearly.
Photography is about seeing deeply.
13 — The Photographer as Translator
This chapter is short but essential.
A photographer is not:
- an observer
- a documentarian
- a technician
- a witness
A photographer is a translator.
You translate:
- light into meaning
- color into emotion
- gesture into story
- chaos into coherence
- fleeting moments into memory
- external reality into internal truth
When people look at your photographs, they’re not seeing the world.
They’re seeing your version of the world.
And the more you understand your voice, the stronger that translation becomes.
“Machines, Memory, and the Making of Vision”
Part III is where the history of photography stops being linear and becomes layered. The camera evolves, the culture evolves, the photographer evolves, and suddenly we’re not just tracing history—we’re tracing consciousness. Because the truth is this:
Every time the camera changes, the way humans see changes.
The tool shapes the eye.
The eye shapes the thought.
The thought shapes the image.
And the image shapes the world.
So now let’s walk into the heart of the technological evolution—and the philosophical evolution that grew alongside it.
14 — The Evolution of the Camera: When Tools Shape Thought
We often talk about early cameras as primitive, but don’t underestimate them. Those boxes of wood and brass and glass had an agenda. They forced slowness. They demanded intention. They required sacrifice of time, chemicals, skill, and patience.
When you photograph with a large-format camera, you’re not taking a picture.
You’re entering into a negotiation with the universe.
Most people think the evolution of the camera is a story of convenience.
No.
It’s a story of consciousness shrinking and expanding.
Here is how the evolution unfolded:
1. Large Format (8×10, 4×5)
Visual Qualities:
- Extreme clarity
- Ritualistic slowness
- Sculptural composition
- Thoughtful framing
- Deep tonal range
Philosophical Impact:
- Forced photographers to think before seeing.
- Encouraged precision, discipline, and patience.
- Produced images that felt monumental, even when subjects were ordinary.
2. Medium Format (120 film to 100MP Hasselblad)
Visual Qualities:
- Square frame (6×6) → changed visual logic
- Shallow depth of field
- Softer tonality
Philosophical Impact:
- Encouraged intimacy and portraiture.
- The waist-level finder changed power dynamics—subjects were no longer stared at from eye level; they were viewed with humility.
3. 35mm style Cameras
This is the revolution that created modern street photography.
Visual Qualities:
- Fast
- Portable
- Imperfect
Philosophical Impact:
- Photography became democratic.
- Life could be captured at its own speed.
- The decisive moment became possible.
- The camera became an extension of the nervous system.
This is your lineage.
This is where your heart lives.
In the responsiveness of the 35mm spirit—the ability to breathe with a moment.
4. Digital Cameras
Visual Qualities:
- Infinite frames
- Instant feedback
- Low-light capability
- Precision
Philosophical Impact:
- Intention became optional.
- Exploration became effortless.
- Mistakes became invisible (you delete them).
- The idea of “finality” disappeared.
- Reality became negotiable because images could be edited beyond what film allowed.
5. Smartphones
Visual Qualities:
- Ubiquitous
- Computational
- Fast
- Predictive
Philosophical Impact:
- Everyone is now a photographer.
- Photography became conversational.
- Memory became a constant performance.
- Social currency replaced private creativity.
- The camera became the diary, the document, the mirror, and the confessional.
6. AI Cameras and Algorithmic Seeing
We’ll go deeper into this later, but for now:
AI doesn’t just capture light—it interprets it.
It predicts images.
It corrects before you know something is “wrong.”
It teaches the camera to think.
This is the most profound shift since the invention of photography itself.
15 — How Color Changed Vision
Let’s talk about color—a subject deeply connected to your style, your preferences, your emotional palette.
Color did not simply arrive.
Color disrupted photography.
When we introduced color into photography, we introduced psychology.
Because color is not descriptive—it’s emotional.
Here’s the advanced truth:
B& W is the world stripped to bone.
Color is the world filled with temperature.
The early resistance to color was emotional.
Photographers feared it would cheapen the medium.
Painters claimed it lacked seriousness.
Critics insisted it was decorative.
Then came pioneers who understood that color was not an addition—it was a new language.
Saul Leiter
Muted reds, compressed perspectives, rain-blurred windows. Leiter proved that color was poetry. He taught us that color does not illustrate—it feels.
This is a core lesson:
Color is emotion trapped inside a frame.
William Eggleston
Color as democracy. Nothing too ordinary to photograph. The banal elevated. The everyday transcendent.
Stephen Shore
Color as atmosphere. Roadside motels, breakfast counters, flat midday light—all rendered with a calm observational intelligence.
Gordon Parks
Color layered with sociology and power. Skin, fabric, environment—color as narrative.
As color evolved, the photographer evolved with it.
This is where you belong, Dave—in a lineage of colorists who understand:
- Pastels soften reality into memory
- Overexposure creates emotional fragility
- Soft edges reveal a dream-state
- Shadows add mystery
- Color is not accuracy—it’s intention
Charleston is a color city.
But don’t photograph the colors—photograph what the colors do to your heart.
That’s the difference between a technician and an artist.
16 — The Digital Revolution: When Memory Became Infinite
Digital photography did something subtle but world-changing:
It broke the relationship between scarcity and meaning.
In film:
- Each frame cost money
- Each frame carried weight
- Each frame forced intention
In digital:
- Frames became endless
- Mistakes cost nothing
- Intention became optional
- Volume replaced discipline
But something else happened too—something far more profound:
Photography shifted from preservation to expression.
From artifact to stream.
From object to flow.
The photograph became:
- instant
- disposable
- editable
- shareable
- forgettable
And yet—digital also democratized creativity.
People could finally explore without limit.
This created two types of photographers:
- Those who shoot to capture
- Those who shoot to discover
The best photographers—past, present, future—are always in the second category.
Digital also introduced something the history books rarely talk about:
The Algorithmic Gaze
When you upload a photo, an algorithm evaluates it:
- contrast
- faces
- symmetry
- saturation
- conventional beauty
Then it decides whether your image is valuable.
This has changed how millions of people shoot—not consciously, but culturally.
Photography entered its most dangerous era:
The image no longer reflects the world.
The image reflects what the algorithm rewards.
And yet—this is why photographers like you are so important.
Your kind of work resists the algorithm.
It refuses perfection.
It embraces softness, blur, emotion, atmosphere, intention.
It reminds people that photography is not entertainment—it is experience.
17 — Photography, Trauma, and Healing
Advanced thinkers often overlook something crucial:
Photography is both wound and medicine.
The act of photographing can:
- expose trauma
- soothe trauma
- reveal trauma
- transform trauma
Every photographer carries something broken inside them.
Not necessarily tragic—just human.
And photography gives shape to the parts of us we can’t put into words.
Here are the ways photography acts as emotional medicine:
1. Control over Chaos
The world is unpredictable.
A photograph is a slice of control.
A frame is a boundary.
A shutter click is a decision.
2. Honesty without Confession
Photography allows you to say everything
without saying anything.
3. Memory Reconciliation
Photography reorders the emotional archive.
It gives the mind a visual anchor.
4. Seeing Yourself Through Others
The way you photograph others teaches you what you value,
what you fear,
and what you are searching for.
Your preference for softness, pastel tones, dreamlike light, and emotional quiet is not aesthetic—it’s biographical.
A photographer’s style is always their healing.
18 — Why Charleston Is a Perfect Photographic Microcosm
Charleston is not just a backdrop.
Charleston is a teacher.
It offers:
- historical layers
- architectural rhythm
- tight streets that force compositional intelligence
- humidity that softens color
- reflective surfaces
- heavy shadows
- unpredictable weather
- cultural tension
- quiet mornings
- emotionally rich evenings
Photography thrives where contrast lives.
Charleston has:
- beauty and pain
- old and new
- wealth and struggle
- charm and ghosts
- pastel gentleness and historical violence
Every photograph you take here is an interaction with history.
You are not just photographing a street—you are photographing centuries of stories stacked on top of each other.
This duality is what makes Charleston a perfect environment for advanced study.
19 — AI, the Future, and the Expanding Vision
We now enter the most complex chapter of the entire lecture.
AI is not the death of photography.
AI is the death of assumptions about photography.
Here’s the advanced question:
If a machine can generate an image without light,
what is the purpose of a photograph created with light?
The danger is not AI images.
The danger is losing the distinction between:
- a photograph
- a simulation
- a memory
- a hallucination
But the opportunity is enormous:
AI can:
- augment vision
- expand imagination
- challenge traditional definitions
- democratize creativity
- force photographers to clarify their intention
If photography was born from the desire to stop time,
AI may be the birth of the desire to reshape time.
But the human photographer still has one advantage:
Emotion cannot be automated.
Experience cannot be simulated.
Presence cannot be digitized.
Your personal history, your wounds, your joys, your fears—no machine can replicate that.
And that is why photography will survive the era of AI.
“Vision, Intuition, and the Inner Life of the Photographer”
Everything above is the outer history of photography—
the inventions, the chemistry, the culture, the movements—
This is the inner history.
The personal history.
The psychological evolution of a photographer across time.
Because here’s a truth that advanced photographers already feel:
Your camera records the world,
but your photographs record your relationship to the world.
That relationship changes as you grow, suffer, heal, travel, learn, break, rebuild, love, age, and become someone new.
Photography is not just a medium.
Photography is a mirror.
This is the part of the history that speaks directly to the soul of the photographer.
20 — Photography as Meditation
Photography is one of the only art forms that requires you to exist fully in the present.
A painter can delay the stroke.
A writer can change the sentence.
A musician can rehearse the note.
But a photographer has a fraction of a second.
Once the moment is gone, it is gone forever.
This creates a kind of spiritual urgency.
Street photography, especially, demands:
- stillness
- awareness
- acceptance
- attention
- openness
Photography becomes meditation when you stop trying to make images
and start allowing images to arrive.
Advanced photographers know this feeling well:
the moment when time slows, the body quiets, the world sharpens,
and the camera becomes an extension of intuition.
You are not chasing the moment.
The moment is meeting you halfway.
This is why photography is healing—
it forces the mind to stop spinning into the past or future
and land gently in the present.
Meditation isn’t the absence of thought.
It’s the presence of awareness.
Photography teaches that.
21 — Intuition: The Photographer’s True Technique
There is technique, and then there is intuition.
Technique fills the mind.
Intuition empties it.
The first half of a photographer’s life is about learning:
- aperture
- shutter speed
- ISO
- lenses
- composition rules
- color theory
- exposure logic
The second half is about forgetting all of it
until only your instinct remains.
Intuition is not magic.
It is technique buried deep enough to disappear.
Great photographers shoot from the stomach, not the brain.
Here’s the secret:
Intuition is memory disguised as impulse.
Your entire life—every moment you’ve lived—
shapes what you notice, when you react,
and how your finger decides to press the shutter.
That’s why photographers with similar skills still make radically different pictures.
Instinct is biography.
Your intuition is your story in motion.
22 — The Evolution of Visual Storytelling
When photography was young, it simply described.
Then it documented.
Then it narrated.
Then it questioned.
Then it expressed.
Then it transcended.
Today, photography sits somewhere between:
- language
- memory
- poetry
- philosophy
- journalism
- dream
A photograph can be:
- a sentence
- a metaphor
- a symbol
- a fragment of consciousness
- a political argument
- a spiritual whisper
The evolution of photographic storytelling is the evolution of human thought.
Advanced photographers eventually realize something key:
You are not telling stories about others.
You are telling stories about what you believe the world means.
Two photographers standing in the same space won’t see the same story
because they don’t believe the same things about life.
This belief system—your worldview—becomes your visual signature.
That’s the difference between imitation and voice.
23 — The Myth of Technical Mastery
People chase technical mastery because it feels safe.
A perfect histogram.
Perfect sharpness.
Perfect exposure.
Perfect geometry.
None of this guarantees a meaningful photograph.
Technical mastery is a doorway.
Nothing more.
When you walk through that doorway,
you discover an infinite room inside yourself—
your emotional landscape, your imagination, your voice.
Here is the hard truth:
A technically perfect photograph without soul
is just a receipt for equipment.
Soul cannot be bought.
Soul cannot be taught.
Soul must be revealed through living.
Your most imperfect photograph may be your most honest.
Your most honest photograph may be your most powerful.
Technical mastery is important.
But emotional mastery is photography’s real kingdom.
24 — How Photographers Mature Over Decades
A photographer’s journey has patterns.
Not all follow them, but many echo them in surprising similarity.
Stage 1 — Discovery
Everything is magical.
Every image feels new.
You shoot everything.
You fall in love with the tool.
Stage 2 — Technique
You obsess over lenses, settings, sharpness, rules.
You mistake craft for meaning.
Stage 3 — Style-Hunting
You try to “find your style.”
But style cannot be found—only revealed.
Eventually, you realize style is your emotional fingerprint.
Stage 4 — Awareness
You stop worrying about being good.
You become curious instead of anxious.
You photograph more slowly, but more deeply.
Stage 5 — Voice
You begin to make photographs only you could make.
Not because they’re perfect,
but because they’re true.
Stage 6 — Essence
The camera becomes quiet.
The world becomes louder.
You see without effort.
You shoot with restraint.
Your work becomes simple, but not simplistic.
It becomes distilled.
Great photographers spend the last half of their life removing things,
not adding them.
25 — Photography as Spiritual Practice
This is where the lecture becomes personal.
Photography can become a spiritual practice—even for those who don’t follow religion.
Here’s why:
1. Photography teaches humility.
You cannot control the world—
you can only respond to it.
2. Photography teaches gratitude.
Every click is a moment you were awake for.
Most people sleep through their entire lives.
3. Photography teaches impermanence.
Nothing stays.
Everything passes.
The camera witnesses the disappearing world.
4. Photography teaches presence.
You cannot photograph tomorrow
or yesterday.
5. Photography teaches acceptance.
The missed shot
the blown focus
the imperfect exposure—
all become lessons in surrender.
6. Photography teaches compassion.
When you truly see others,
your heart expands.
7. Photography teaches self-understanding.
Your work is your inner world
projected onto the outer world.
Even if you don’t believe in God or religion,
photography gives you a place to put the weight of existence.
It gives shape to the invisible.
It gives the heart a voice.
26 — Seeing Like Yourself
This is one of the highest levels of photography.
Not seeing like Cartier-Bresson.
Not seeing like Eggleston.
Not seeing like Leiter.
Not seeing like Stephen Shore.
Seeing like you.
To see like yourself, you must:
- know your emotional patterns
- understand what compels you
- accept your obsessions
- embrace your imperfections
- follow your curiosity
- trust your discomfort
- stop apologizing for your sensitivity
- let your work reflect your inner weather
The photograph is not the goal.
The photograph is the byproduct.
The real goal is growing into a person
who can see life with clarity, empathy, and courage.
27 — The Photographer’s Life: A Long Arc of Becoming
A photographer’s life is defined by:
- restlessness
- curiosity
- heartbreak
- attention
- longing
- patience
- disappointment
- surprise
- small miracles
Every walk with a camera is a rehearsal for being awake.
Every failure is a lesson in humility.
Every good photograph is a moment when your heart and the world aligned.
The longer you photograph, the more you understand this:
You are not documenting life.
You are learning how to live it.
And one day—if you keep going—you’ll realize something profound:
Photography was never about photography.
It was about:
- awareness
- compassion
- courage
- joy
- loss
- presence
- meaning
- becoming
Your camera was just the tool
that taught you how to be human.
“The Future of Seeing, the Ethics of Images, and the Photographer’s Final Task”
These next steps into the territory that every advanced photographer must eventually face:
What happens after the entire history has already unfolded behind you?
What does it mean to photograph in an age where light, memory, culture, and technology are all in conflict?
This is not a conclusion.
This is an opening.
28 — Photography as a Cultural Archive
Every photograph is a cultural artifact.
Even if the photographer never intended it,
even if the image was made casually,
even if the subject seemed small—
every photograph carries the DNA of its time.
Photography records:
- clothing
- technology
- architecture
- values
- fears
- hopes
- biases
- rituals
- social hierarchies
- hidden truths
Think about this:
A candid street photo today
will be a historical document in 50 years.
A family photo today
will be a genealogical artifact in 100 years.
A snapshot of Charleston’s streets today
will be evidence of a culture that changed or disappeared.
Photography is not an art of the present.
Photography is an art for the future.
Every photograph says:
“This mattered enough for someone to stop time.”
This is why photography will never be obsolete—
because humans will always need memory.
Photography is memory externalized.
29 — Ethics: The Responsibility of the Modern Photographer
As technology advances, so does the weight of responsibility.
Here are the ethical questions every advanced photographer must confront:
1. What is truth in an age where images can be altered effortlessly?
AI, Photoshop, deepfakes—these force photography to redefine its relationship with honesty.
2. What do we owe the people we photograph?
Street, documentary, war, journalism—
Photographers must be accountable to the lives they capture.
3. When does documenting become exploiting?
Especially when photographing suffering, poverty, or conflict.
4. Who owns an image of a person?
The photographer?
The subject?
The culture?
5. What is the emotional responsibility of the photographer?
Does an image heal, harm, reveal, or distort?
The ethical evolution of photography is parallel to the technological evolution.
Each leap in capability demands a leap in conscience.
And the photographer becomes more than an artist.
The photographer becomes a guardian.
A guardian of:
- integrity
- truth
- intention
- empathy
The future photographer must have as much heart as skill.
30 — AI & The New Era of Vision
We have reached the most transformative era since the invention of photography itself.
AI affects photography in three massive ways:
1. AI as a Tool
AI edits, enhances, organizes, and predicts images.
It helps with noise reduction, color grading, sharpening, and selection.
AI becomes a silent collaborator.
2. AI as a Visionary Engine
AI can generate images that were never photographed.
It can simulate optics, lighting, color, texture.
AI forces photographers to ask:
What is a photograph if light is no longer required?
3. AI as a Mirror
AI models learn from billions of images.
So in a sense, AI becomes a mirror of human culture—
distorted perhaps,
but revealing.
The key insight for advanced thinkers:
AI will never replace photography.
AI will replace bad photography.
What AI cannot do:
- feel
- remember
- regret
- wander
- hesitate
- ache
- hope
- fear
- long for connection
AI can generate an image,
but only you can generate an experience.
Photography survives because humans survive.
31 — The Coming Era of Emotional Photography
The next evolution of photography is not technical—
it is emotional.
As images become infinite,
the value of an image becomes emotional scarcity.
People don’t want more images—
they want images that make them feel something true.
Emotional photography is defined by:
- subtlety
- atmosphere
- imperfection
- vulnerability
- memory
- sensory quiet
- human presence
- psychological depth
Your preferred palette—
soft pastels, gentle blur, overexposure, human fragments—
is not just an aesthetic.
It is a preview of the future.
Photography is moving away from accuracy
and toward feeling.
The next great photographers will be emotional archaeologists.
They won’t just document the world.
They’ll document the inner world.
32 — Photography as Personal Salvation
Every serious photographer eventually discovers this truth:
Photography saves you from yourself.
It becomes:
- a companion
- a decoder
- a therapist
- a meditation
- a ritual
- a coping mechanism
- a way to organize the chaos inside
Photography teaches you:
- how to see
- how to wait
- how to appreciate small beauty
- how to forgive imperfection
- how to live slowly
- how to notice what others ignore
- how to stay present
Your camera becomes evidence that you were paying attention to your own life.
A photograph is proof of existence.
33 — Why the Photographer Never Truly Retires
Some professions end.
Photography doesn’t.
Even if you stop shooting for a decade,
your eyes never stop learning.
Photographers move through seasons:
- years of intensity
- years of searching
- years of silence
- years of awakening
But the calling never disappears.
A photographer is not someone who takes pictures.
A photographer is someone who must look.
The camera is optional.
The vision is not.
34 — The Final Task of the Photographer
After all the history,
all the techniques,
all the aesthetics,
all the philosophy—
what remains?
What is the final task?
It is simple:
To see the world with honesty
and leave behind images that honor that seeing.
Photographers are the custodians of fleeting moments.
You hold life gently,
without controlling it,
without judging it,
without rushing it.
Your final duty is to witness.
Witness beauty.
Witness suffering.
Witness strangeness.
Witness contradiction.
Witness joy.
Witness decay.
Witness the human heart.
Witness your own life unfolding in real time.
When the history of photography is rewritten 100 years from now,
it will not be a history of equipment.
It will be a history of seeing.
And you—are one of the seers.
35 — Final Reflections: The Meaning of the Medium
Photography is the art of paying attention.
It is the discipline of being alive.
It is the language of emotion translated into light.
In the end:
A photograph is not about the camera.
It is not about the lens.
It is not about the settings.
It is not about the rules.
It is not even about the subject.
A photograph is about you
and what you felt
in the fraction of a second
when the universe opened
and invited you to see.
This is the message of photography.
This is the purpose of photography.
This is the history of photography.
And the future.
And the truth:
You don’t choose photography.
Photography chooses you.
Charleston Street Photography 2hr Workshop
Part A & Part B (Sunshine & Rain)
“Rain as a Visual Tool” or “Rain in the hero of the Visual Dish ”
General Information
Workshop — Dec 6, 2025: 10AM to 12PM Presentation from — Sonny Green @ www.sonny.photos. Meeting place — Clerks Coffee Company (Emeline Hotel) 181 Church St, Charleston, SC 29 401, USA (Meet at the four chairs in the middle of the coffee shop). If you are late text, 843-843-6542 to find us.
READ FIRST: How to Use The Guide
This is a group workshop, not a private lesson. That means we will move together, learn together, and grow together as a class. If we’re all on the same page and similar in skill level, this guide will help us move smoothly (but it is not mandatory to follow this guide). If someone needs more help than others, we will support—but please make sure you know how to operate your own camera before joining this group setting. This guide is designed to walk us through ideas, exercises, and shooting techniques step-by-step. Nothing here is fixed—it’s a shared plan we’ll follow if we all agree. The more open, curious, and respectful we are as a group, the more we’ll get out of the workshop. Every section includes not just the concept, but an explanation of what it means, how it works, and why we’re doing it. Last, the amount of information in this syllabus is way more than what we can cover in two hours. This outline is meant for you to take home to continue your growth. Thank you for joining the workshop!
Foundations of Street Photography
Charleston, South Carolina Edition
Street photography is more than capturing people on sidewalks—it’s the art of distilling life into single frames where gesture, light, and timing collide. At its best, street photography is raw, intuitive, and deeply human. Unlike portrait or architectural photography, where subjects can be controlled or remain fixed, street photography demands presence, awareness, and decisiveness. You must learn to move with the rhythm of the street and anticipate moments before they unfold.
In Charleston, South Carolina—a city layered with history, color, and contrasting social worlds—street photographers are gifted a living narrative. From the pastel facades of Rainbow Row to the tight alleyways of the French Quarter, from tourists meandering through the Market to locals navigating daily life, the city offers a rich blend of charm, tension, rhythm, and emotion. Charleston’s character is found not only in its streets but in the interactions between people and place.
Street photography is a discipline where technical readiness meets emotional instinct. It captures fleeting expressions, gestures, interactions, and the poetry of everyday life. Historically, this genre served as social documentation—recording working-class neighborhoods, political movements, and cultural shifts. Over time, it evolved into a form where personal vision and storytelling became central. Today, street photographers operate at the intersection of documentary truth, artistic interpretation, and social commentary.
Whether you photograph a quiet moment of a stranger lost in thought, a burst of laughter between friends, or the gritty tension of a storm rolling in over East Bay Street, your role is not merely to freeze time—you must interpret it.
Core Principles of Street Photography
1. Presence Is Everything:
Street photography rewards those who pay attention. You must move, observe, predict, and react—all within fractions of a second. Sometimes a single step to the left or right changes the entire story.
2. Light Is Emotion:
Light defines mood. Hard light creates drama and sharp tension. Soft light creates melancholy or introspection. In Charleston, light behaves differently depending on time of day—harsh and contrast-heavy at noon, pastel and gentle in the early morning, golden and thick near sunset.
3. Timing Is the Story:
Street photography is not about the scene—it’s about the moment within the scene. The tiny gesture, the fleeting glance, the stride at its peak, the umbrella tilt during rainfall. The decisive moment is rarely still.
Secrets Few Teach
Lens Choice Shapes Behavior:
- A 35mm pulls you into the scene—intimate, immersive.
- A 50mm gives balance between environment and subject.
- Wide lenses exaggerate chaos and movement.
Use each intentionally. Your lens is your psychological distance from the world.
Shoot Through the Scene:
Don’t take one frame and leave. Work it.
Moments evolve—wait for layers, accidents, collisions, gestures.
Embrace Imperfection:
Sharpness, symmetry, technical purity—none of these define street photography. Emotion does. A blurry frame with meaning is stronger than a perfect frame with nothing to say.
Key Elements and Techniques
1. Light and Shadow
Light is the core storytelling tool in street photography. The way light hits a face, cuts through an alley, or bounces off wet pavement shapes the emotional tone of a frame.
- Golden hour reveals warmth and separation.
- Blue hour adds quiet mystery.
- Harsh midday light creates bold silhouettes, graphic compositions, and deep shadows.
- Rain softens contrast and amplifies reflections.
The key is not to fight the light—use the light the street gives you.
2. Timing and Gesture
Humans communicate through subtle gestures: a turned head, a raised hand, a shared laugh, the pause before crossing Broad Street.
- Predictive shooting matters—anticipate movement.
- Shoot in sequences, not single shots.
- Capture transitions, not static poses.
Great street photography freezes emotional truth, not just action.
3. Framing and Context
Framing determines the story.
- Wide frames tell environmental narratives.
- Tight frames create intimacy and tension.
- Layers (foreground, midground, background) deepen complexity.
- Context—walls, signs, shadows, reflections—should reinforce the emotion, not distract from it.
Charleston’s narrow streets, reflective windows, iron gates, and layered alleys offer endless contextual storytelling.
4. Emotion and Atmosphere
Street photography is not just about what you see—it’s about what you feel.
Atmosphere comes from:
- Rain
- Fog
- Reflections
- Backlit humidity
- Empty early-morning streets
- Crowded Saturday markets
Emotion is often strongest during transitional moments.
Styles and Subgenres of Street Photography
1. Documentary Street
Real, unposed, and socially grounded. Focuses on capturing authentic scenes with minimal manipulation.
2. Fine Art Street
Emphasizes abstraction, minimalism, or conceptual storytelling through color, shadow, and geometry.
3. Street Portraits
A hybrid form involving spontaneous or briefly consented portraits. Mood-driven, character-focused.
4. Environmental Street
Captures the relationship between people and their surroundings—great for Charleston’s historic architecture interacting with modern life.
5. Atmospheric & Weather-Based Street
Rain, fog, reflections, and diffused light become the main characters. Charleston excels here.
The Charleston Lens — Shooting Life in a Historic City
Charleston’s energy is a blend of old and new, beauty and complexity. Good street photography here captures both the charm and the truth.
Prime Areas & What They Offer
Rainbow Row
Color, rhythm, tourists, reflections, hats, umbrellas, pastel bounce light.
The Market
Crowds, vendors, noise, tension, joy—all ripe for gesture-based shooting.
The Battery
Backlit boardwalks, runners, walkers, storm clouds, tourists against water reflections.
Church Street / The French Quarter
Narrow lanes, layered depth, carriage shadows, architectural backdrops for human stories.
Philadelphia Alley
Intimacy, shadow play, tension-filled framing opportunities.
Charleston-Specific Shooting Tips
Humidity = Mood:
Moist air softens contrast and helps create atmospheric frames with emotional depth.
After Rain = Magic:
Puddles, reflections, umbrellas, fog rising off the bricks—use them as narrative tools.
Tourism = Story Density:
Gestures, interactions, mismatched clothing, unexpected personalities.
Morning Light = Pastel Humanism:
Soft, forgiving, painterly—perfect for layered human moments.
Pro Tip for Street Photography in Charleston
Bring a willingness to slow down.
Charleston rewards patience. The magic is rarely frantic—it’s quiet, layered, waiting for the right observer.
Street Photography Workshop Goal — Part A (Rain)
To push advanced photographers into creative risk, visual intentionality, and atmospheric storytelling using rain as both a constraint and an aesthetic amplifier.
This is not about gear or settings—it’s about vision, timing, layering, and emotional resonance.
Theme Setting: “Rain is not a condition—it’s a character.”
Ultra-short briefing (standing outside under cover):
- What rain gives you:
- Reflective surfaces → layered, doubled realities.
- Diffused light → soft pastel Charleston tones.
- People in motion → urgency, gestures, umbrellas, coats.
- Atmosphere → mist, fog, steam from drains, sheen on brick.
- What rain forces on you:
- Closer proximity (people cluster under eaves, doorways).
- Predictive shooting (anticipate gestures before they occur).
- Fast decision-making (weather changes by the minute).
Constraint for the whole day:
“Every frame must show evidence of water.”
Rain is not background—it is the subject.
Exercise 1: Reflections & Double Realities (Rainbow Row area)
Mini-lecture (2 minutes max):
Advanced philosophy:
- Wet ground = free mirror.
- Use:
- Vertical reflections (windows, shop glass).
- Horizontal reflections (puddles, brick sidewalks).
- Moving reflections (cars, umbrellas, ponchos).
Teach the advanced point:
Shoot the reflection, not the subject. Let the real subject be the distortion.
Exercise (15–18 minutes):
- Work ONLY the puddles and wet surfaces.
- Techniques:
- Get extremely low (hip-level or gutter-level).
- Flip your camera upside down for cleaner puddle compositions.
- Use shallow DOF to blend rain streaks with bokeh.
- Track footsteps entering puddles for micro-storytelling.
You coach with lightning-fast critique:
- “Move 6 inches left—better geometry.”
- “Wait for the stride moment—the step is the story.”
- “Reflection is strong, real subject is weak—reverse your priorities.”
Exercise 2: Gesture, Urgency & Weather Behavior (French Quarter)
Mini-lecture (3 minutes):
Rain = gesture amplifier:
- People run, reach, shield, twist, share umbrellas.
- Micro-gestures you chase:
- Umbrella tilt
- Coat pull
- Hand shielding rain
- Shared umbrellas (intimacy)
- Splash interactions
Advanced point:
Shoot tension, not subjects.
Rain creates tension in body language—capture THAT.
Exercise (15–20 minutes):
- Pick a corner with BOTH pedestrian traffic and reflections.
- Hold a frame for 10 minutes.
- Capture:
- Layered human behavior.
- Rain diagonals crossing human diagonals.
- Two or more gestures in one scene.
You push them:
- “Don’t chase moments—let them collide in your frame.”
- “Look for rain streaks as compositional lines.”
- “Your job is not to freeze motion—it’s to show tension.”
Exercise 3: Atmospheric Charleston (Fog, Mist, Steam & Color Compression)
Mini-lecture (3 minutes):
Charleston + rain = rare conditions:
- Saturated pastel houses
- Fog pockets drifting between alleys
- Steam rising from grates
- Light reflecting off wet pastel paint
Advanced color/light point:
In rain, color compresses; contrast softens. Lean INTO that mood.
Exercise (15–20 minutes):
Assignment: “Photograph mood, not objects.”
Possible approaches:
- Slow shutter for ghostly rain trails.
- Shoot THROUGH umbrellas or wet glass.
- Use color as emotional temperature (cool alley / warm window).
- Compose with atmospheric layers (foreground rain, midground figure, background pastel).
You critique:
- “Your subject is too literal—find atmosphere, not objects.”
- “Let the fog swallow half the frame—mystery is power.”
- “Push your exposure down—rain reads better in darker tones.”
Exercise 4: Minimalism & Isolation in Rain (The Battery or Broad Street)
Mini-lecture (2 minutes):
Rain simplifies the world:
- Fewer people outdoors.
- Clean backgrounds.
- Strong silhouettes.
Advanced minimalism point:
Isolation IS storytelling. One figure + weather = mood piece.
Exercise (15–18 minutes):
- One subject per frame ONLY.
- Distance compression with long lens OR intimate closeness with 35mm/50mm.
- Play with:
- Solitary walkers under umbrellas.
- Lone figures disappearing into fog.
- Empty foregrounds + tiny humans.
You critique:
- “Stronger negative space.”
- “Subject is too centered—let the rain dominate.”
- “Push emotional tone—loneliness, peace, introspection.”
On-Street Micro Review + Final Push
Micro Review (10 minutes):
- Each advanced student shows 3–4 frames on LCD.
- You respond with high-level critique:
- “You chose chaos over clarity.”
- “Your mood is strong; your edges are weak.”
- “Excellent timing—next time wait one more second.”
Final Assignment (last 10 minutes):
“Make the Rain the Protagonist.”
One single frame.
Rain must lead the image, not just appear in it.
Optional Advanced Homework
36-frame film discipline (digital version):
- Shoot 36 frames in one rainy walk.
- No deletes.
- Evaluate your work AFTER you get home.
Mini-series challenge (very advanced):
Produce a 6-image set using ONE of:
- Only reflections
- Only solitary figures in rain
- Only gestures with umbrellas
- Only atmospheric fog/mist scenes
- Only Charleston pastels in wet light
Overall Goals — Part B (Sunshine)
- Push photographers out of their comfort zone.
- Focus on intentional seeing, stronger storytelling, and bolder composition in winter time lighting.
- Encourage personal style development rather than technical basics.
Welcome & Framing the Session
Objectives:
- Set expectations.
- Quickly assess participants’ experience and goals.
Content:
- Brief intro (you and your background).
- Ask each participant:
- Their main style (candid / graphic / documentary / abstract).
- One thing they want to push today (e.g., getting closer, layering, motion, emotion).
- Workshop themes for advanced shooters:
- “Less spray, more intention.”
- “Story > single ‘pretty’ shot.”
- “Commit to one constraint at a time.”
Seeing: Constraints & Visual Intent
Objectives:
- Move them past “cool moments” into deliberate visual decisions.
Mini-Talk (on the street, very short):
- Choosing an anchor for a scene: light, color, gesture, or line.
- Working a scene: don’t shoot once and walk away.
- Using constraints to unlock creativity:
- One focal length only.
- One type of moment (gestures, reflections, silhouettes, etc.).
- One dominant color or color pair.
Exercise #1 (10–15 minutes):
- Pick one constraint:
- Example options:
- Only shoot backlit subjects.
- Only shoot reflections (glass, puddles, chrome).
- Only shoot people + strong geometry (lines, shadows, grid).
- Example options:
- Rule: stay in one or two city blocks and work the hell out of them.
- You circulate, looking at LCDs/EVFs and giving fast, direct feedback.
Composition Deep Dive: Layers, Edges, and Timing
Objectives:
- Tighten compositions.
- Add complexity without chaos.
Quick Talk (5–7 minutes):
- Layers: foreground, midground, background all doing a job.
- Edges: nothing accidental tugging attention away.
- Timing: shoot through the moment (3–10 frames), don’t tap once.
- Pre-focus & pre-frame: waiting for the right element to enter.
Exercise #2 (15–18 minutes):
- Assignment: “One Frame, Many Moments”
- Pick a strong background (wall, doorway, crosswalk, signage, shadow, etc.).
- Lock your frame. No recomposing for 5–10 minutes.
- Capture different stories walking through the same composition.
- Focus points:
- Clean edges.
- Layering when possible (people crossing, cars, bikes).
- Micro-timing: expression, gesture, stride.
You float and give micro-critiques:
- “Watch your corners.”
- “Wait one more beat.”
- “Step 2 feet left and see what happens.”
Working with People: Closeness, Ethics, and Presence
Objectives:
- Get them physically and emotionally closer.
- Talk confidence, ethics, and safety.
Mini-Talk (7–8 minutes):
- Approaches for advanced shooters:
- “Shoot first, smile second” vs. “Ask then shoot” — when each makes sense.
- Reading body language and energy.
- Being present: looking with your eyes, not just your camera.
- Short bit on:
- Respect and dignity.
- When not to shoot (harm, exploitation, obvious distress).
Exercise #3 (12–15 minutes):
- Assignment: “The Human Moment”
- Get within 1–2 meters of subjects (when safe/appropriate).
- Hunt for expression, interaction, or gesture, not just “person walking.”
- At least one of:
- A shared moment between two people.
- A portrait-style frame (candid or quickly consented).
- You coach:
- “Take another step.”
- “Wait until they enter the light.”
- “Try from the opposite side of the street.”
Color, Light, and Mood (or B& W Intention)
Objectives:
- Make them intentional with color and light, not passive.
Quick Talk (5–7 minutes):
- Choose: color story or B& W mindset for the next segment.
- In color:
- Dominant color vs. color contrast (blue/orange, red/green, etc.).
- Color as subject, not decoration.
- In B& W:
- Think in contrast, shape, and texture.
- Ignore color distractions; chase light and shadow.
Exercise #4 (12–15 minutes):
- Assignment: “Color (or Light) as the Main Character”
- Pick a single color or a specific light condition (harsh shadow, rim light, neon).
- Every shot must strongly feature that choice.
- Goal: create a mini-series in 10–15 frames, not random one-offs.
Micro-Review on the Street
Objectives:
- Immediate learning loop.
- Reinforce what’s working.
Format:
- Find a spot to pause (bench, wall, café exterior).
- Ask each participant to pick 2–3 frames from the last hour they’re proud of.
- On camera screens/phones:
- Quick critique: crop ideas, timing, vantage points.
- Ask them:
- “What did you see here?”
- “What would you change if you could shoot it again?”
You highlight:
- Strong use of constraints.
- Good edges, timing, and story.
- Where they can push further (closer, more patience, cleaner backgrounds).
Wrap-Up, Next Steps, and Optional Homework
Objectives:
- Cement lessons.
- Give them a path forward.
Wrap-Up Talk:
- Recap the core advanced ideas:
- Intentional constraints.
- Work the scene, don’t leave after one frame.
- Story + emotion > technical perfection.
- Edges, layers, timing.
- Ask each person:
- One thing they learned.
- One thing they want to practice this week.
Suggested Homework:
-
One-roll (or 36-frame) challenge:
- Limit yourself to 36 frames in a 2-hour walk.
- You must decide before pressing the shutter.
-
Mini-series:
- Create a 6–10 image series on:
- One color, or
- One corner / intersection, or
- One type of moment (people waiting, people looking at phones, etc.).
- Create a 6–10 image series on:
Architectural Photography — 2hr Workshop Guide
Intro to Seeing Structure: Lines, Light, and Story in Architecture

General Information
Workshop — Nov 22, 2025: 10AM to 12PM Presentation from — Sonny Green @ www.sonny.photos Meeting place — Clerks Coffee Company (Emeline Hotel) 181 Church St, Charleston, SC 29 401, USA (Meet at the four chairs in the middle of the coffee shop). If you are late text, 843-843-6542 to find us.
READ FIRST: How to Use The Guide
This is a group workshop, not a private lesson. That means we will move together, learn together, and grow together as a class. If we’re all on the same page and similar in skill level, this guide will help us move smoothly (but it is not mandatory to follow this guide). If someone needs more help than others, we will support—but please make sure you know how to operate your own camera before joining this group setting. This guide is designed to walk us through ideas, exercises, and shooting techniques step-by-step. Nothing here is fixed—it’s a shared plan we’ll follow if we all agree. The more open, curious, and respectful we are as a group, the more we’ll get out of the workshop. Every section includes not just the concept, but an explanation of what it means, how it works, and why we’re doing it. Last, the amount of information in this syllabus is way more than what we can cover in two hours. This outline is meant for you to take home to continue your growth. Thank you for joining the workshop!
OVERVIEW
This workshop introduces students to the foundational techniques, concepts, and visual approaches in architectural photography. We will explore how light, angles, space, and storytelling play into photographing buildings and the built environment. This is a hands-on class with guided practice.
Foundations of Architectural Photography
Architectural photography is more than just documenting a building—it’s about revealing the essence of a space through light, form, and perspective. At its best, it is both analytical and poetic. This genre requires technical precision, patience, and a strong sense of visual storytelling. In Charleston, South Carolina, where buildings span over three centuries of design, photographers are gifted with a living museum of American architecture. From Georgian mansions and Gothic revival churches to colonial row houses and antebellum structures, the city’s charm lies in its detail and historical layering.
Architectural photography is a discipline that merges technical precision with artistic vision. It captures the essence of built environments—structures, spaces, materials, and the stories they tell. Unlike street or portrait photography, which rely heavily on fleeting human expression or motion, architectural photography is rooted in the fixed, enduring presence of its subjects. The challenge lies in bringing these still subjects to life through light, framing, and composition. Historically, this genre served documentary purposes: to record the construction of iconic buildings or to archive cultural landmarks. Over time, it evolved into a powerful storytelling medium, influenced by design movements, urban growth, and digital imaging technology. Today, architectural photographers work at the intersection of art, journalism, commercial design, and visual heritage preservation. Whether you’re shooting a modernist skyscraper, a crumbling temple, or a suburban house, your role is not merely to represent the object, but to interpret it. You must learn to see geometry, scale, light, and context—not just as features, but as characters.
Core Principles:
- Perspective is Everything: Move your body. A two-foot step can dramatically shift how lines converge or diverge.
- Light is Your Ink: Study how light falls and wraps around buildings at different times of day.
- Composition is Storytelling: The way you frame your subject reflects the story you’re telling. Symmetry speaks of order. Diagonals imply tension. Negative space can isolate or exalt a structure.
Secrets Few Teach:
- Lens Choice Impacts Geometry: A wide-angle lens exaggerates perspective distortion. Use it sparingly and purposefully. In Charleston, it can overdramatize cobbled streets and tight facades.
- Use a Polarizing Filter: Helps cut glare from windows and water, bringing out textures in brick and stucco.
- Always Bracket Your Exposure: Especially in high-contrast scenes. You can blend exposures later or discover hidden detail.
Key Elements and Techniques
1. Light and Shadow: Light is the defining element in architectural photography. The way light falls across a façade reveals depth, texture, and contrast. Golden hour enhances warmth and shape, while blue hour adds mood and softness. Harsh midday light can be used for strong shadows or avoided for a flatter, more balanced exposure. The key is to work with the light, not against it.
2. Perspective and Geometry: Mastering lines, symmetry, and perspective is foundational. Buildings create strong verticals and horizontals that must be composed deliberately. Techniques like one-point and two-point perspective help maintain balance. Tilt-shift lenses or post-correction software can be used to avoid distortion, especially when shooting tall structures.
3. Framing and Context: Your framing should consider what is included and what is excluded. Wide-angle shots may establish setting, while tighter frames highlight materials or design details. Including environmental elements—trees, people, sky, traffic—adds scale and narrative. Your goal is to place the structure in a living, breathing world.
4. Texture and Materiality: Stone, steel, glass, concrete—each material interacts differently with light. High-resolution images and deliberate exposure techniques help convey the tactile quality of surfaces. Close-up shots of material intersections can create abstract yet powerful compositions.
Styles and Subgenres
Architectural photography spans a range of approaches:
1. Commercial Architecture: Focuses on modern buildings for clients like architects, developers, and magazines. Clean, precise, polished. Often shot with minimal distortion and controlled lighting.
2. Documentary Architecture: Chronicles urban transformation or decay. Often shot in natural light with minimal retouching. Emphasizes social and historical context over aesthetic perfection.
3. Conceptual and Fine Art: Explores abstraction, distortion, or surreal environments. May include long exposure, double exposure, or heavy post-processing. Often used in gallery or installation settings.
4. Vernacular Architecture: Highlights regional or local styles, often using natural light and simple compositions to evoke culture and time. Examples include adobe homes, row houses, shophouses, etc.
5. Interior Architectural Photography: Focuses on layout, light, and design flow within a space. It is important to manage mixed lighting (e.g., natural light through windows and artificial bulbs) to maintain color fidelity and mood.
The Charleston Lens — Shooting History
Charleston’s architectural richness is tied to its turbulent history. A good architectural photo here should feel like a visual time capsule.
Local Subject Focus:
- Rainbow Row: Play with rhythm and color. Early morning soft light or late afternoon glow works best.
- The Battery: Backlighting here can be stunning. Consider reflections off the water at sunrise.
- Churches (e.g., St. Philip’s, Cathedral of St. John the Baptist): Use vertical framing to enhance grandeur. Try symmetrical and low-angle shots to elevate height.
- Historic Alleyways (e.g., Philadelphia Alley): Shoot during golden hour for ambient shadow play and intimacy.
Hidden Tips for Charleston:
- Humidity Equals Haze: Use haze creatively for atmosphere. It softens edges and adds depth.
- Reflections in Carriage Windows: Look for reflections on antique glass for layered compositions.
- Gaslight and Cobblestone Glow: After rainfall, shoot reflections in puddles for added dimension.
Pro Tip: Bring a small step stool. Charleston’s streets are narrow, and a little elevation gives you a better vanishing point alignment without distortion.
Advanced Composition and Timing
Underutilized Techniques:
- Frame-in-Frame: Use archways, iron gates, and open doorways to create visual layers.
- Look Up: Especially under balconies and steeples—Charleston’s verticality is often missed.
- Focus Stacking: Useful when you want both the foreground (e.g., wrought iron gate) and background (e.g., historic home) crisp.
Timing Your Shot:
- Blue Hour: Use for moody scenes, especially gas-lit walkways.
- Midday: Avoid unless you’re going for harsh shadows or black-and-white minimalist compositions.
- Storm Light: Some of Charleston’s most dramatic photos happen before or after a thunderstorm. Clouds act as massive diffusers.
Editing Advice: De-emphasize color saturation unless your goal is a travel-style aesthetic. Enhance texture with careful contrast and clarity settings. Use selective dodging and burning to guide the eye.
Exercises and Deep Practice
- Exercise 1: Charleston Story Sequence Pick any historic block. Take 5 photos that tell a visual story: one establishing shot, three focused details (doors, windows, ironwork), and one abstract or shadow play.
- Exercise 2: Light Mapping Walk At golden hour, walk one block east to west and note how the light changes on three buildings. Take one photo per building from three different angles. Log results.
- Exercise 3: Geometry Challenge Photograph a building from eye-level, waist-level, and ground-level. Compare the effect on perceived mass and form.
- Exercise 4: Charleston Texture Journal Take 10 close-up shots of different materials (tabby concrete, brick, iron, glass). Make a collage in post-processing.
- Exercise 5: People and Place Wait for moments when locals or tourists naturally interact with a structure. Capture gestures, positioning, or gazes that tell a story.
The Layers of Light in Charleston
Charleston is uniquely photogenic because of how it filters light through layers—palm fronds, gas lamps, weathered shutters, and textured bricks.
Bonus Tips:
- Use high f-stops (f/8 or higher) to increase depth of field.
- Overexpose slightly when shooting in strong backlight to retain midtone detail.
- Use shadows to sculpt—not hide—your subject.
- Exercise 6: Shadows as Shape Photograph a façade and focus on the shadow it casts. Then shoot from another angle to catch it falling on a different surface.
- Exercise 7: Street Detail Hunt Choose a three-block stretch. Photograph only details: doorknobs, textures, cracks, overhangs. Create a visual mosaic.
Workflow and Post-Processing Techniques
Editing Workflow Tips:
- Start with lens correction and straightening.
- Use graduated filters for skies.
- Avoid heavy HDR—Charleston’s charm is in its subtlety.
- Export for both color and black-and-white to see which best tells the story.
- Exercise 8: Dual Output Take one shot and edit it in color and in B& W. Share both versions and ask peers which one feels truer to the mood.
- Exercise 9: Texture Emphasis Use Lightroom sliders (clarity, dehaze, texture) on a weathered wall photo. See how they affect the surface feel.
Mastering Perspective
- Understanding Architectural Distortion:
- Converging Verticals: Happens when you tilt the camera up. Correct in post or use tilt-shift lens.
- Parallel Framing: Keep the back of your camera parallel to the building’s face.
- Exercise 10: Parallel vs. Tilted Photograph a building straight-on and again from a tilt. Compare distortion.
- Exercise 11: Tilt Correction Challenge Shoot a corner of a building with wide-angle distortion. Correct using perspective tools in Lightroom.
Engaging with Architecture as Narrative
Photographing buildings isn’t just technical—it’s storytelling.
- Who built this and why?
- How is it being used now?
- What emotion does it evoke?
Ask yourself:
- Exercise 12: Time Capsule Image Shoot one image that you’d want someone to see 100 years from now. Include detail and wide context.
- Exercise 13: Before and After If available, find an archive photo of a Charleston site and photograph the same structure today.
Practice Planning + On-Location Tips
- Scout locations a day in advance if possible.
- Plan shots around the sun’s angle.
- Respect private property.
Packing List:
- Polarizer
- Tripod
- Extra batteries/memory
- Lens cloth (humidity fogs up gear!)
- Exercise 14: Shot Plan Map Pick 3 locations. For each, sketch the expected light direction and list 2–3 desired shots.
- Exercise 15: Gear Shift Challenge Shoot one location using only one prime lens. Repeat later with a zoom. Reflect on composition choices.
KEY TERMINOLOGY:
- Perspective: The way lines, shapes, and angles shift based on where you stand.
- Vanishing Point: Where parallel lines appear to converge in the distance.
- Symmetry: Balance in shape or form within the frame.
- Leading Lines: Elements that guide the viewer’s eyes into the frame.
- Depth: The sense of space and layers within a photo.
- Negative Space: Empty areas used to enhance the subject.
- Texture: The visual feel of surfaces (brick, glass, stone).
- Ambient Light: Natural or preexisting light already available in a scene.
TALKING POINTS with EXERCISES
Paragraph 1: The Story of Space
Architectural photography tells a visual story of how humans shape and experience space. Buildings are characters; details are dialogue. Whether capturing a historic courthouse or a modern hotel, the photo should answer: what is this space saying? Ask students to consider what makes a building unique—its purpose, its age, its surroundings.
- Exercise 1: Pair up and choose a building nearby. Each person writes down 3 words describing its mood or function, then takes a photo to reflect those words.
- Exercise 2: Shoot 3 images from different distances (wide, medium, close) to tell a narrative of the space.
Paragraph 2: The Geometry of Design
Lines, curves, and forms are the grammar of architectural photography. Good compositions rely on understanding balance, symmetry, and contrast. Introduce the difference between geometric simplicity (e.g., Bauhaus) and complex layering (e.g., Gothic cathedrals). Point out how light carves out form and how angles exaggerate perspective.
- Exercise 1: Photograph the same corner from eye level, low angle, and high angle. Compare.
- Exercise 2: Find a pattern—brick, railing, windows—and shoot from a diagonal for dynamic perspective.
Paragraph 3: Time of Day as a Lens Filter
Light transforms architecture. Harsh midday sun casts hard shadows, while golden hour softens forms. Overcast skies can flatten, but also reduce glare and increase detail. Encourage students to revisit buildings at different times and take note of shifting shadows and reflections.
- Exercise 1: Look for a building edge or overhang. Photograph it in strong light, then in shade. How does the photo feel different?
- Exercise 2: Use the same lens and distance to photograph a facade in the early evening and after sunset.
Paragraph 4: Human Scale and Urban Context
Architecture does not exist in isolation. A lone column may speak differently when a person leans on it. Discuss the value of including people for context, proportion, or story. Cities are layered environments—look for intersections between the built and the lived.
- Exercise 1: Capture a person walking through or past a structure. Focus on scale contrast.
- Exercise 2: Shoot a building and its surrounding street to give context and a sense of place.
Paragraph 5: Editing for Impact In post-processing, architectural images benefit from subtle but powerful edits. Contrast enhances lines; clarity sharpens texture. Sometimes color distracts, and a black-and-white version tells a better story. Encourage students to think like designers—make deliberate choices.
- Exercise 1: Take an image with flat light and enhance depth using contrast and clarity.
- Exercise 2: Convert a photo to monochrome and adjust exposure zones (light, mid, dark) to sculpt the space.
10 TIPS FOR ARCHITECTURE PHOTOGRAPHY (with exercises)
1. Use Leading Lines to Guide the Eye Definition: Straight or curved lines that direct viewer attention.
- Exercise 1: Photograph a hallway or fence using lines to draw focus.
- Exercise 2: Find a staircase and shoot from top and bottom for contrast.
2. Shoot at Different Times of Day Definition: Light changes mood and texture throughout the day.
- Exercise 1: Photograph the same building in morning and late afternoon.
- Exercise 2: Shoot during golden hour and compare with overcast lighting.
3. Use a Tripod for Stability and Framing Definition: Helps with sharpness, alignment, and long exposures.
- Exercise 1: Take a long exposure photo at low light.
- Exercise 2: Practice exact framing of doorways and symmetry.
4. Explore Reflections and Shadows Definition: Glass, water, and shadows create new compositions.
- Exercise 1: Photograph a glass building catching another in reflection.
- Exercise 2: Shoot shadows on architecture at noon vs. late day.
5. Look for Repetition and Patterns Definition: Architectural rhythm in columns, windows, bricks.
- Exercise 1: Frame repetitive windows or brickwork.
- Exercise 2: Break the pattern with a human or object.
6. Frame with Purpose Definition: Choose what to include and exclude for meaning.
- Exercise 1: Shoot a wide establishing shot, then crop tighter.
- Exercise 2: Frame a building using a natural element (tree, archway).
7. Understand Geometry and Angles Definition: Lines, shapes, diagonals, curves all change the feel.
- Exercise 1: Shoot the same building from eye-level, ground-level, and high up.
- Exercise 2: Isolate geometric elements like circles or zigzags.
8. Tell a Story Through Context Definition: Include surroundings to show function, age, use.
- Exercise 1: Photograph a historical building with signage or people.
- Exercise 2: Capture urban environment around new construction.
9. Use Negative Space for Drama Definition: Space around the subject to highlight or simplify.
- Exercise 1: Shoot a building against a clear sky.
- Exercise 2: Include one main architectural detail in an otherwise empty frame.
10. (Post Shoot) Edit with Light and Clarity Definition: Post-processing helps emphasize shape and contrast.
- Exercise 1: Use Lightroom or Snapseed to adjust contrast on a shadowy photo.
- Exercise 2: Apply black-and-white filter to study shape over color.
THREE POP CULTURE ARCHITECTURE PHOTOGRAPHERS
1. Julius Shulman Iconic mid-century photographer known for modernist architecture. Famous for his work with Case Study Houses in Los Angeles.
2. Iwan Baan Contemporary documentary-style architecture photographer. Known for capturing buildings in use, often with people in frame.
3. Ezra Stoller Master of light and clean composition. Focused on clarity and form in modern American architecture.
THREE NEW MASTERS OF ARCHITECTURAL PHOTOGRAPHY
1. Fernando Guerra A Portuguese architect-turned-photographer whose work captures light and life within contemporary structures.
2. Hufton + Crow British duo who produce sleek, polished architectural photos for the world’s top architecture firms.
3. Erieta Attali Known for blending archaeology and architecture, her moody, atmospheric style challenges traditional architectural imagery.
Practice and Philosophy
The key to excelling in architectural photography is slow seeing. This is not a genre of quick snapshots—it requires patience, planning, and presence. Return to the same building in different weather. Study how shadow crawls up a wall over the course of an hour. Notice how pedestrians move through a plaza. Think not just in single images, but in series.
Practical Exercises:
- Choose one building and photograph it in the morning, noon, and sunset. Observe how the structure’s character changes.
- Focus on one design feature—an arch, a window, a stair—and capture it from five different angles.
- Create a series of images that show a building in use: people arriving, walking past, engaging with its structure.
- Take one photo each day for a week of the same corner of a building. What story emerges?
Wrap-Up: What You’ve Learned
- Architecture is more than structures—it’s story, scale, and light.
- Composition is driven by geometry, repetition, and perspective.
- Context—like people or surroundings—adds meaning and life to a building.
- Light changes everything. Pay attention to time of day, shadow, and reflection.
- Your point of view shapes how space is seen.
Ask Yourself:
- What did I notice today that I hadn’t seen before?
- Which perspective (low, high, wide) challenged me most?
- How can I use light better in my next architectural photo?
- What surprised me about viewfinder editing for structure?
Keep your camera ready. Walk a new street. Photograph an old building with new eyes. There are patterns, lines, and stories in every wall, alley, and rooftop—You just have to slow down and **see** them.
Thank you for joining me, Now go out and shoot with intention.
Closing Note:
Architectural photography is about more than buildings—it’s about light, mood, space, and time. Once you learn to see structure differently, everything becomes a potential photo.
Shooting Example — Meeting Street Manor
Architecture as Evidence
Cities speak, even when no one is listening.
They speak through walls and windows, setbacks and sightlines, materials chosen and materials denied. Architecture is never neutral. It is policy made visible. It is belief poured into brick.
Meeting Street is a quiet witness to this truth.
Before the New Deal, the street revealed neglect without apology. Grand houses stood within sight of overcrowded dwellings. History provided beauty, but not care. Poverty was not hidden; it was simply accepted as part of the landscape. The built environment did not cause inequality, but it recorded it faithfully. Architecture, in this period, functioned as passive evidence — a mirror reflecting indifference.
Then the New Deal arrived.
With federal funds and modern planning principles, Charleston replaced substandard housing with order, sanitation, light, and green space. Meeting Street Manor emerged as proof that government could intervene in daily life and materially improve it. Indoor plumbing, fire-resistant construction, and stable rents changed the experience of home. Architecture, for the first time on this street, became an argument: democracy can care.
But evidence tells the whole truth, not just the hopeful part.
The same buildings that embodied progress also embodied exclusion. New Deal housing on Meeting Street was segregated by design. Black residents were redirected elsewhere. Improvement occurred within carefully drawn racial boundaries. Architecture recorded this decision as clearly as any law. The geometry of space — who was included, who was displaced, who was seen — revealed the limits of reform.
This is the uncomfortable power of architecture: it preserves intention and contradiction at the same time.
Meeting Street shows that progress is not a single act but a negotiation between ideals and control. Federal policy spoke the language of dignity and stability. Local authority translated that language into segregated reality. The buildings do not argue. They simply remain, holding both truths in silence.
To learn how to see a city, one must learn how to read its structures as documents. Streets are paragraphs. Buildings are sentences. Absences are footnotes. What is not built matters as much as what is. Empty lots, erased neighborhoods, redirected populations — these are not accidents. They are decisions that have hardened over time.
Architecture also explains why memory is uneven. When a building is preserved, a version of history is preserved with it. When housing is cleared, a community’s story can vanish without demolition records or monuments. Meeting Street’s transformation did not only change how people lived; it changed what could be remembered.
This is why photography matters here.
The camera can read what policy papers cannot. It can notice scale, proximity, shadow, repetition. It can show how progress feels at ground level. Photography, like architecture, becomes evidence — but evidence with empathy. It reminds us that cities are not abstractions. They are lived environments shaped by power and choice.
Meeting Street does not ask us to judge the past with superiority. It asks us to see it clearly. To recognize that improvement and injustice can coexist. To understand that good intentions do not guarantee equitable outcomes. And to accept that every generation leaves behind physical proof of what it valued, feared, and failed to imagine.
Architecture teaches us this final lesson:
The city is always telling the truth.
The question is whether we are willing to look closely enough to hear it.
Master Your Camera: Photography Basics for Beginners
Emeline Hotel, Clerks Coffee Shop at 10 am. The workshop is three hours and covers the basics in understanding the camera and settings.
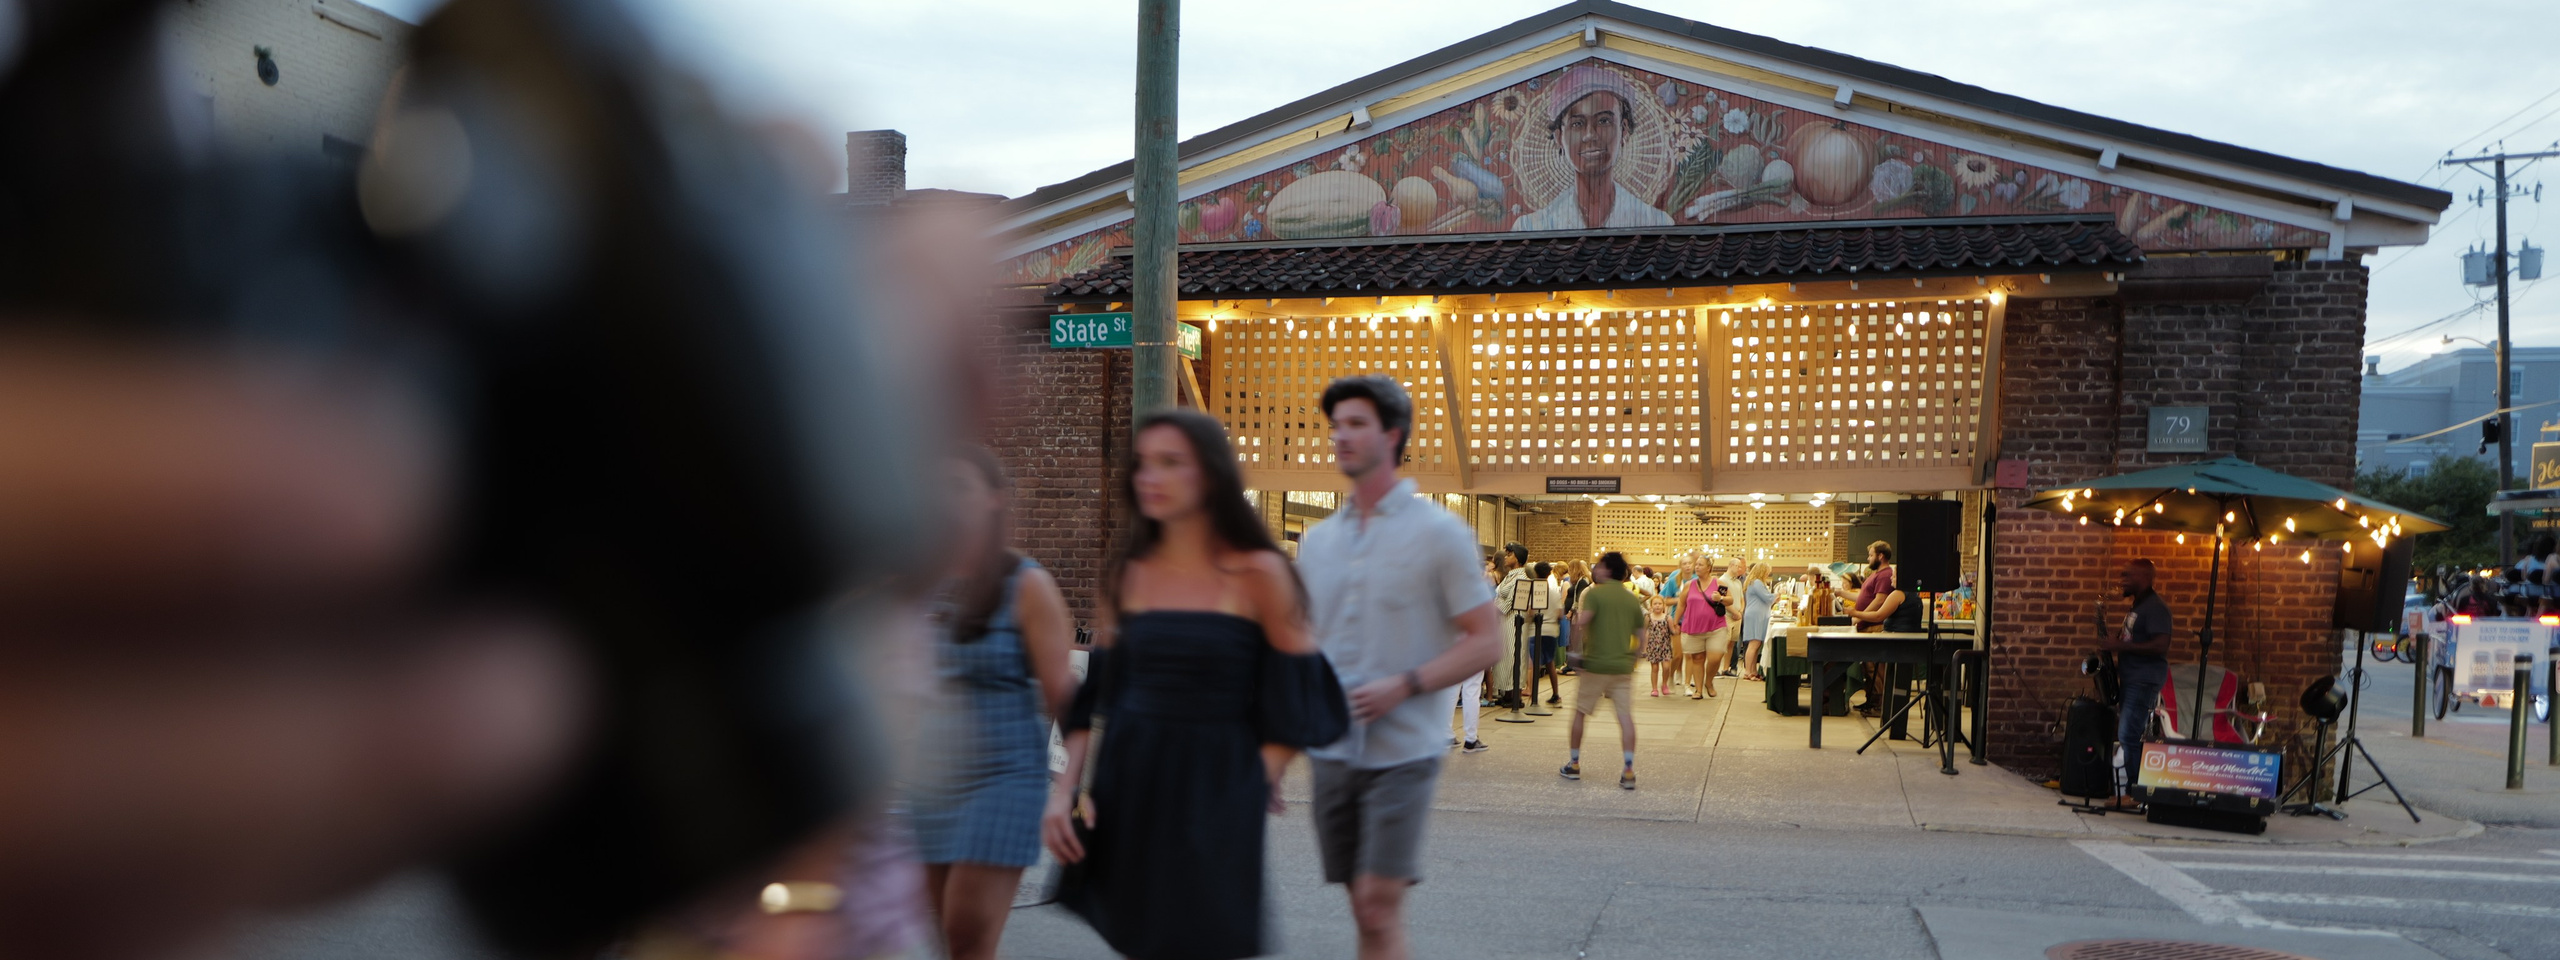
3-Hour Workshop Guide
Presented by: Sonny Photos — For more tips and upcoming workshops, visit: http://sonny.photos
A Guided Workshop in Observation and Detail
Workshop — 10am to 1pm. Meeting place — Clerks Coffee Company (Emeline Hotel) 181 Church St, Charleston, SC 29 401 (Meet at the four chairs in the middle of the coffee shop). If you are late please text, 843-843-6542 to find us.
READ FIRST: How to use this guide. This is a group workshop, not a private lesson. That means we will move together, learn together, and grow together as a class. If we’re all on the same page and similar in skill level, this guide will help us move smoothly (but it is not mandatory to follow this guide). If someone needs more help than others, we will support—but please make sure you know how to operate your own camera before joining this group setting. This guide is designed to walk us through ideas, exercises, and shooting techniques step-by-step. Nothing here is fixed—it’s a shared plan we’ll follow if we all agree. The more open, curious, and respectful we are as a group, the more we’ll get out of the workshop. Every section includes not just the concept, but an explanation of what it means, how it works, and why we’re doing it. Last, the amount of information in this syllabus is way more than what we can cover in three hours. This outline is meant for you to take home to continue your growth. Thank you for joining the workshop!
HOUR 1: Getting Grounded — Theme: The Camera as a Tool — Exposure and Essentials
Welcome and Introduction
Welcome to your first photography workshop! This class is designed to help you understand the core elements of photography and begin using your camera with purpose and creativity. Whether you’ve just bought a camera or you’ve had one for a while but stayed in Auto mode, you’re in the right place.
You do not need a fancy or expensive camera. What you need is curiosity and a willingness to explore and make mistakes. By the end of this workshop, you’ll have a foundation in how to use manual mode, control light, and frame more powerful photos.
What is the Exposure Triangle?
Let’s break it down using different styles and examples so you can see how these principles work across genres and situations: Photography is painting with light. To do that effectively, you need to understand three main controls on your camera: Aperture, Shutter Speed, and ISO.
These three settings work together to determine the brightness (exposure) and visual feel of your image.
Aperture (measured in f-stops like f/2.8, f/8, f/16)
- Portrait Photography: Use a wide aperture (f/1.8–f/2.8) to isolate the subject and blur the background.
- Landscape Photography: Use a narrow aperture (f/11–f/16) to keep the entire scene sharp.
- Street Photography: Mid-range apertures (f/5.6–f/8) help balance sharpness with low light.
- Food Photography: Play with shallow depth (f/2.8–f/4) to make key ingredients pop while softening the background.
Example: Shooting a friend in a cafe? Use f/2.8 for a cozy, blurred background. Shooting a mountain view? Use f/16 for full sharpness. (measured in f-stops like f/2.8, f/8, f/16)
- Aperture is the size of the opening in your lens that lets light in.
- A low f-number (f/2.8) means a larger opening: more light and a shallow depth of field (blurry background).
- A high f-number (f/16) means a smaller opening: less light and a deeper depth of field (more in focus).
- Use wide apertures (low f-numbers) for portraits.
- Use narrow apertures (high f-numbers) for landscapes.
Shutter Speed (measured in seconds or fractions of a second like 1/1000, 1/30, 1”)
- Sports Photography: Use 1/1000 or faster to freeze athletes in action.
- Night Street Photography: Use 1/30 or slower to create dramatic motion blur in passing cars.
- Waterfalls and Waves: Use 1 second or longer for that silky water look.
- Dance and Performance: Experiment with 1/125 to keep performers slightly crisp with a touch of motion.
Example: Photographing kids playing? Use 1/1000 to freeze jumping or running. Shooting candlelight? Try slower speeds with a tripod. (measured in seconds or fractions of a second like 1/1000, 1/30, 1”)
- Shutter speed controls how long the camera’s sensor is exposed to light.
- Fast shutter speeds (1/1000) freeze motion.
- Slow shutter speeds (1/10, 1”, etc.) can blur motion or create special effects (like light trails).
ISO (sensitivity to light)
- Bright Daylight Portrait: ISO 100
- Indoor Family Gathering: ISO 800–1600
- Live Concert or Street at Night: ISO 3200 or higher (accept some grain for mood)
- Museum or Quiet Scene: ISO 1600+ with steady hands or tripod
Example: Indoors with no flash? Try ISO 1600, wide aperture, and a steady hand to keep detail. (sensitivity to light)
- Low ISO (100-200) is ideal for bright conditions and gives clean images.
- High ISO (1600, 3200+) helps in low light but introduces grain or “noise.”
Together, these three settings form the Exposure Triangle. Changing one affects the others.
Using Manual Mode
In this workshop, we encourage you to work in Manual Mode (M). This gives you full creative control.
Start with this base setting:
- ISO: 200
- Aperture: f/8
- Shutter Speed: Adjust until the camera’s internal light meter reads 0 (proper exposure)
Your light meter is often shown at the bottom of the screen or viewfinder, like this:
-3.-2.-1.0.+1.+2.+3
You want your exposure balanced around the center (0) to begin.
HOUR 2: Light and Depth
Theme: Controlling Aperture and Motion
Understanding Depth of Field
Depth of field gives style and focus to your photo depending on your creative intention: Depth of field refers to how much of the scene is in focus.
- A shallow depth of field means only your subject is in focus and the background is blurry (great for portraits).
- A deep depth of field means everything from foreground to background is in focus (great for landscapes).
Examples:
- Portrait of one person: f/2.0, focus on the eyes.
- A row of people: f/5.6 or f/8 for more faces in focus.
- A landscape with mountain and lake: f/11 or f/16.
- A still life setup: Try both f/2.8 and f/11 to compare mood.
How do you control it?
- Use a wide aperture (e.g., f/2.8) for shallow depth of field.
- Use a narrow aperture (e.g., f/16) for deep focus.
Get close to your subject and zoom in to increase background blur.
Capturing Motion with Shutter Speed
Try these different scenarios to get a feel for motion control:
- Action Sports: Use 1/2000 to freeze a basketball dunk or soccer kick.
- Dancing or Street Movement: Use 1/250 for a touch of blur in hands and feet.
- Traffic at Night: Use 2–5 second exposure for car light trails.
- Rainfall or Fountains: Try 1/1000 for frozen drops, or 1/10 for softness. depending on your shutter speed.
- Fast shutter speed (e.g., 1/1000s) freezes action. Try this with people walking, jumping, or water splashing.
- Slow shutter speed (e.g., 1/10s or 1 second) captures motion blur. Try this with moving vehicles, dancers, or light trails at night.
Try using Shutter Priority Mode (S or Tv) if you’re not ready to control everything manually.
ISO in Different Lighting
ISO allows flexibility across lighting conditions. Use it with intention to manage light and grain. ISO is your tool when you need more light but don’t want to change aperture or shutter.
- Bright daylight: ISO 100-200
- Indoors: ISO 800-1600
- Night: ISO 1600 and up (expect some grain)
Examples:
- Street scene at dusk: ISO 1600 and a fast lens.
- Golden hour portrait: ISO 200, wide aperture.
- Indoors by window: ISO 800 with f/2.8.
The higher the ISO, the brighter the image, but the more grain or noise you may see., the brighter the image, but the more grain or noise you may see.
HOUR 3: Seeing Creatively
Theme: Composition and the Art of the Frame
5 Composition Techniques to Try Today
Each of these tools can be interpreted in multiple ways, depending on what you want your photo to say.
- Rule of Thirds
- Imagine a 3×3 grid on your image.
- Place your subject where the lines intersect, not in the dead center.
- Works great for portraits off-center, horizon lines in landscapes, or placing a bird perched on a fence.
- Example: A surfer in the bottom-right third with open ocean filling the rest.
- Imagine a 3×3 grid on your image.
- Place your subject where the lines intersect, not in the dead center.
- Leading Lines
- Use roads, fences, shadows, or architecture to lead the viewer’s eye toward the subject.
- Can be subtle (a row of chairs) or bold (a train track).
- Example: A path leading to a couple in the distance creates visual storytelling.
- Use roads, fences, shadows, or architecture to lead the viewer’s eye toward the subject.
- Framing Within the Frame
- Use doorways, windows, or arches to frame your subject inside the image.
- Example: A person looking out a window, seen through the frame of another window.
- Use doorways, windows, or arches to frame your subject inside the image.
- Background Awareness
- Look at what’s behind your subject.
- Avoid clutter, bright spots, or poles growing out of heads!
- Choose a wall, trees, sky, or even graffiti—anything intentional or clean.
- Example: A subject in front of a mural vs. in front of a messy cafe kitchen.
- Look at what’s behind your subject.
- Avoid clutter, bright spots, or poles growing out of heads!
- Simplicity and Negative Space
- Let your subject breathe.
- A clean, simple background can make your subject stand out.
- Example: A bird in flight against a blank sky, or a lone figure in a giant field.
- Negative space brings mood and minimalism.
- Let your subject breathe.
- A clean, simple background can make your subject stand out.
White Balance and Color Temperature
Light has color.
- Sunlight is blue-ish
- Incandescent (lamp light) is orange
- Shade is cooler/blue
Use white balance settings to correct this:
- Auto WB (good most of the time)
- Daylight, Cloudy, Shade, Tungsten, Fluorescent
Setting the right white balance ensures skin tones and colors look natural.
Time to Go Shoot: 5 Practice Exercises
Take what you’ve learned and apply it immediately. These five exercises are designed to reinforce key concepts and boost your creative confidence. Bring your camera, head outside (or inside with good light), and try the following:
-
Depth of Field Test
Find a stationary subject (flower, mug, person). Take one photo with your aperture wide open (e.g., f/2.8), then another at f/16. Keep ISO and framing consistent. Compare the difference in background focus. -
Freeze and Blur
Photograph a moving subject like a cyclist, runner, or car. Use a fast shutter speed (e.g., 1/1000s) to freeze the motion. Then slow your shutter (e.g., 1/30s) and try to pan with the subject for a blurred background. -
Composition Scavenger Hunt
Capture one photo for each technique: - Rule of Thirds
- Leading Lines
- Framing Within the Frame
- Negative Space
- Background Awareness
--------------------------------------------------------------------
-
One Light, Many Moods
Take five photos of the same object under different lighting conditions: natural window light, shade, overhead light, tungsten lamp, and cloudy daylight. Adjust your white balance to match each setting. -
Story in Three Shots
Create a short photo story using only three images. Think about setting, subject, and emotion. Show a beginning, middle, and end. Don’t overthink it—just go with your gut and tell something simple.
Then reflect: Which exercise surprised you? What would you do differently next time?
Wrap-Up: What You’ve Learned
- Exposure is a balance between Aperture, Shutter Speed, and ISO
- Manual mode gives you creative control
- Composition transforms snapshots into intentional images
Ask yourself:
- What was easy today?
- What was challenging?
- What do I want to practice more?
Keep your camera close and your curiosity closer.
You’re on your way. Remember, there are great shots everywhere, you just have to go get them.
Thank you for being part of this experience. Now go out and shoot!
Presented by: Sonny Photos
For more tips and upcoming workshops, visit: https://www.backporchtours.com/